Reveals Instead of Moldings

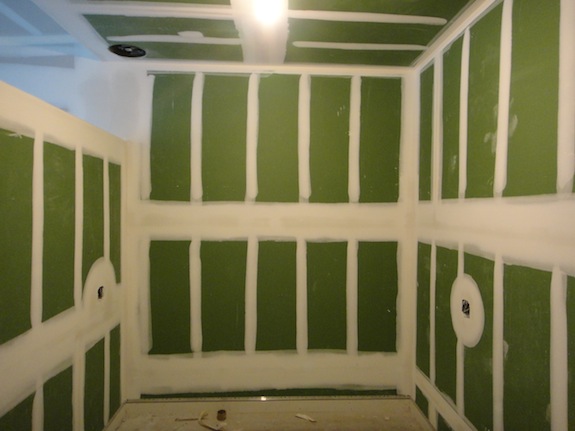
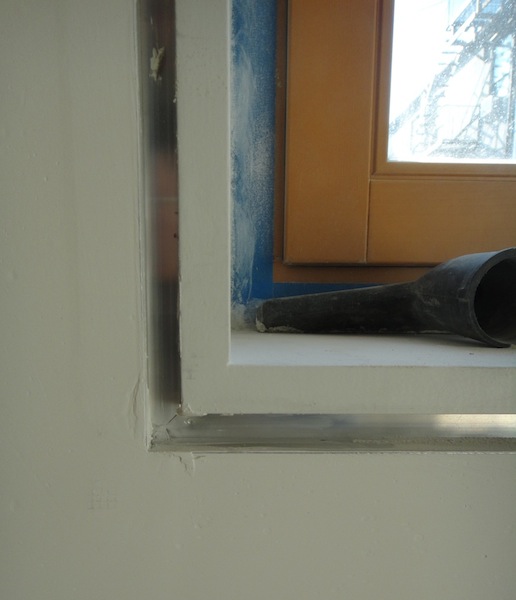
One of the ways the architect stamped his mark on the house was that he’s decided to go with no mouldings anywhere in the house. No crown moldings, no frame around the doors, none around the windows. There is a baseboard, but it doesn’t look much like a baseboard – it’s flush with the drywall with a reveal between the two.

Here’s a picture of what I’m talking about…

z-bead reveal

It needs to be cleaned up, but you can get the idea… That’s pretty much the finished trim. We just have to figure out whether we’re leaving the metal visible or painting it.

The way you achieve that look is to use what’s called a Z-Bead. They’re pretty expensive – 15 cents/linear foot and there’s well over 1000 feet of reveal in the house – so it adds up. plus it takes a detailed oriented workman a while to install it. It’s much easier to just slap a piece of wood trim over the imperfections. It’s funny how “minimal” is often more complicated.

While it’s more expensive, I gotta say it will be one of those subtle details that make people know some care and thought went into both the construction and the design.

Fire Stopping: Something You Don’t Think About

One of the many little things that goes into building a house in New York City is fire stopping. Not many of us stop and think like a fire would – about all the holes fire can find and spread through. We just think in terms of the obvious things like doors.

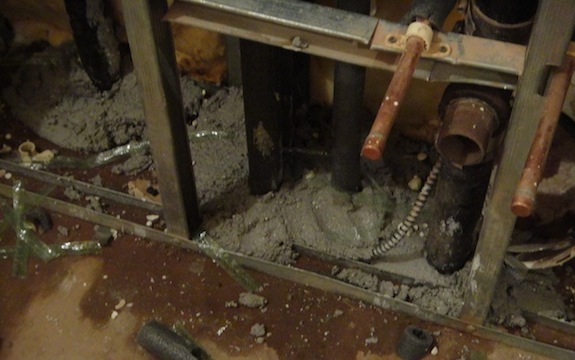
One of those little areas is the plumbing wall. There are big gaps around the pipes and fire likes to spread vertically. I didn’t see it going in, but they put some cement-like stuff in the wall around the pipes to stop fire from traveling up the pipes.

fire stopping around pipes in plumbing wall

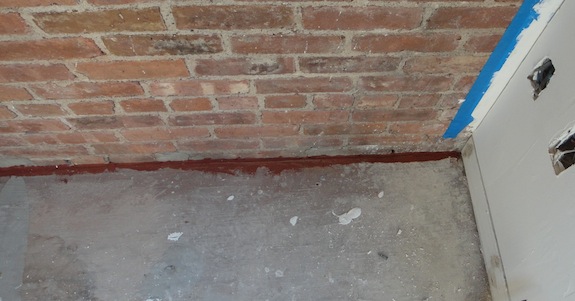
The other area where you wouldn’t think of needing firestopping is between the brick wall and the subfloor. Here they put a special sealant that can withstand fire.

fire stopping subfloor brick

I can start to see how when a fire occurs it take fire fighters are always concerned about where it might be hiding after they’ve got the fire “out” – how it can smoulder in a wall and start back up. Fire is a tricky thing. But NYC’s code is relatively good – someone has to certify the fire stopping measures before the job can be signed off, so contractors can’t ignore it.

Our Cellar Is Getting Pretty Colorful

The house has been so drab for so long it’s sorta interesting to see color come in…

They’re using “green board” in the cellar. Even though the cellar is pretty dry that should help avoid mold. The color of the green board is pretty dramatic especially when it’s put against pink fiberglass insulation…
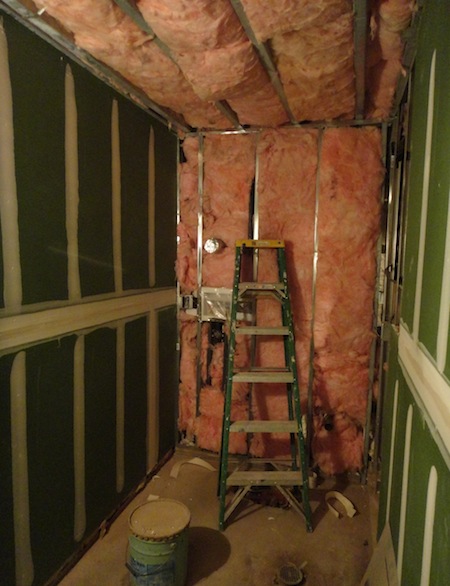
pink green laundry room

The tenant’s laundry room has become really small and dark since the green board went in – but honestly how many people in Manhattan have a proper laundry room? And it will get painted an off-white and it will get lit better, which should make it seem a little bigger.
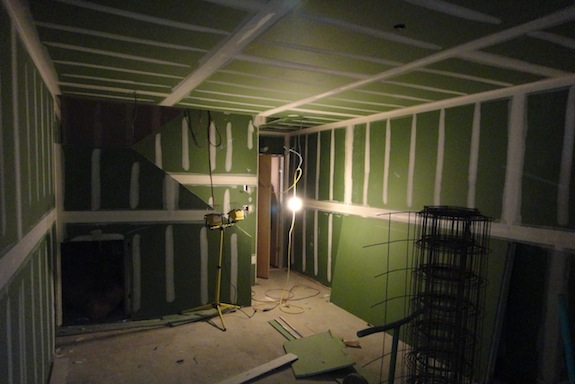
green board in cellar

I took the picture above after dark – so there’s no light coming in the windows – the dim light just makes the color seem all that more dramatic. In reality that’s not what we’re shooting for at all. We want the cellar area to be fairly light bright and warm. Well have an off-white on the walls and the floor will be a fake wood tile.

fake wood tile

Tile that looks like wood is sorta the new thing in tile. It used to be pretty expensive – $12-15/sq. ft., but the price has dropped a lot as the competition kicks in. After all, it’s just another pattern on a ceramic tile – there really isn’t all that different or special. We were able to get ours for $5.75/sq. ft. (including special shipping) from Italian Tile NYC in Brooklyn. They were by far the least expensive option. The others were coming in around the $7/sq. ft. mark, maybe a little lower. Mind you, we got 12″x24″ tile and wood tile really should be done in planks (e.g. 2″x18″, 3″x36″, 4″x36″, 6″x48″, etc) – so it’s not going to be a perfect wood effect. But that would have cost more and at 350 square feet on a rental unit we didn’t want to spend more than we had to.

Planking is another of the new trends in tile. It’s sorta cool actually and only a few companies are offering plank-like sizes (Nemo seems to be the best source in NYC for planked tile). But I think in a year or two the price of planked tile will come down as well – though more sizes adds more distribution and stocking costs.

The whole fake wood floor idea was something I strongly favored from the get go. Dan was pretty reluctant initially but finally we got to the point where he thought it might be OK, the price was right, and we couldn’t find anything better – so we went for it. The reason why I wanted a fake wood floor was because it’s a cellar area so I wanted to go overboard on not making it feel like a cellar. You can’t put a real wood floor in a cellar – it will buckle with the moisture. Laminate floors sorta look like wood, but they sorta look like plastic as well. To me, tiles feel cold. I was pretty picky about the tone and warmth of the tile. We found one that seemed pretty much what we wanted, but it seemed a little dull. The “wood” we went with was the same tone and warmth but would be more visually interesting. Dan’s still a little apprehensive about the choice – so fingers crossed 🙂

Another interesting view color-wise was the green-board for the rental bathroom leaned up against the exposed brick wall in the bedroom. It’s a bit Christmas-like… But in general it’s just good to see color in the house.
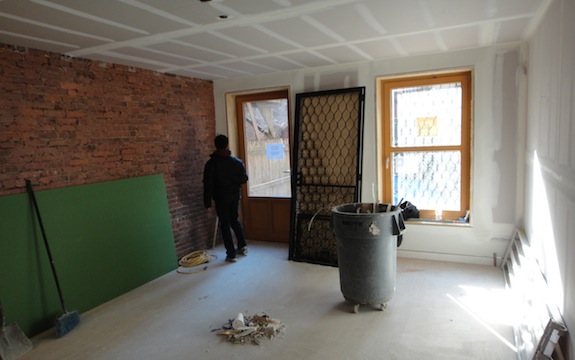
green board red brick

There’s one other type of drywall going in the front part of the cellar – the boiler room and the meter/storage room. It’s an outdoor drywall that’s made for exterior ceilings (porches, etc.) It’s dark gray…
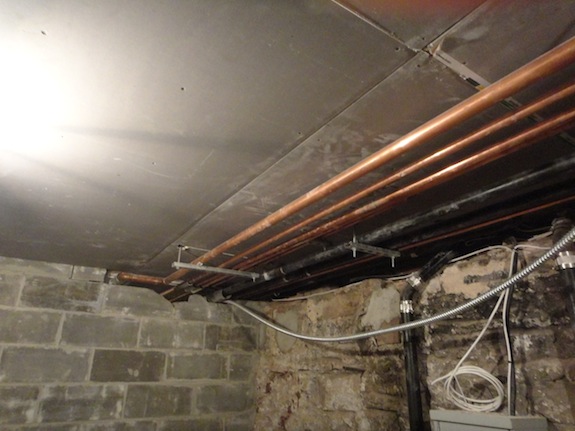
exterior ceiling drywall

I really like the color of that – goes well with the stone walls. We may actually paint the ceiling the same color after it gets taped and mudded.

Drywall Coming Along

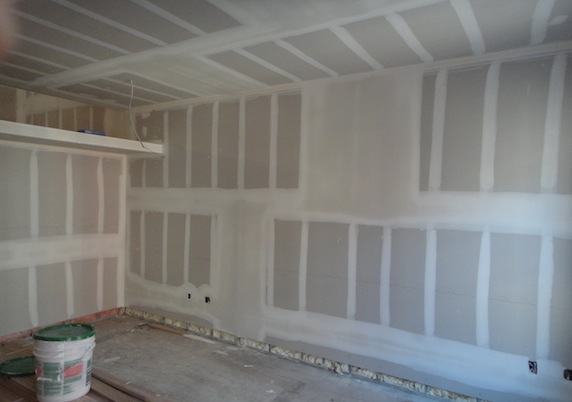
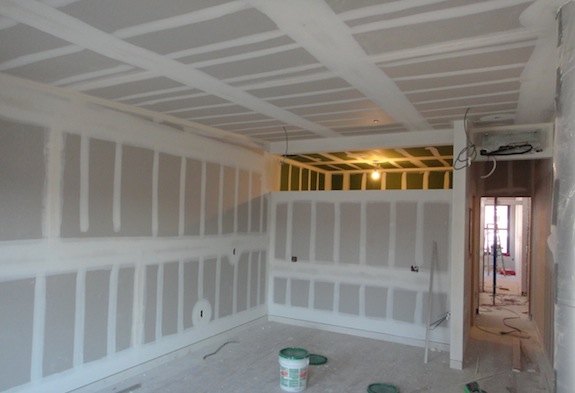
In the past week the contractor (and his sub-contractor) made good progress on drywall. 95% of the drywall is up now. As you can see in the pictures below, much of it is taped and mudded (though more coats may be necessary).

den mudded drywall

Above you see the Den on the master bedroom floor, below is Dan’s dirty studio on the top floor…

dirty studio mudded drywall

And here’s green board up in the wet studio…

wet studio mudded green board

We’ve also picked out the last bit of tile this week (though there’s still a little ordering to be done). I’m excited about the tile choices… We wound up going all over to find tile we liked at a price that was in our budget – but more about that later.

Tuesday the wood floor guy will resume work, and the plumber got back to work a little bit this week and should get more done next week – though there is a delay with the sprinkler PAA – and that has to be complete before we can get the sign off and get heat and water meters (delays, delays – but luckily the weather is warm and it’s not all that critical).

I’m still not exactly sure when they’ll be done. I’d like it to be in the next 4 to 6 weeks, but our architect told us 3 months today. I really just want things to be done and wish I could quickly fast forward to the end.

The Soundproofing Challenge

The other day someone asked me what I would do differently if I had it to do over again. I gave a few examples (the biggest being to get water and electricity up and running before you start construction), but I’d add a better soundproofing strategy to that list. In our case it’s mostly an issue between the two units, though we are a bit disappointed in how you can hear footsteps on the floor above you in our unit. We’re scrambling to try to come up with a better solution for between the two units. In hindsight it’s something we should have taken more time to consider during the planning phase.

The main issue is that our living room is on top of our tenant’s bedroom. If we don’t take soundproofing seriously we’re going to have a very unhappy tenant every time we have people over for dinner or a party.

The first thing we did was an $800 change order to upgrade from fiberglass batt soundproofing to open cell foam soundproofing between the two units. I know there’s some debate about which is better. The fiberglass folks say fiberglass is better, the foam folks say foam is better. Fiberglass apparently has a better (or similar) STC rating (Sound Transmission Control), but open cell foam is supposed to be good at blocking mid-range frequencies like voices. But, that said, we’ve noticed you can still hear voices through the open cell foam – which worries us. Mind you, the ceiling/floor isn’t finished – it’s just a plywood floor subfloor plus the 5+ inches of foam at this point, but we figure we need to do more.

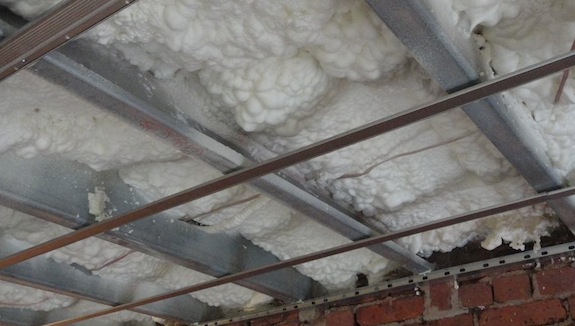
The next big thing we’re doing is metal channels that hang perpendicular to the floor joists. Between the joists and the metal channel is sound proof caulking/foam. Here’s a picture of the channels…

acoustical ceiling framing

You can also see all the open cell foam in the picture above.

The channels screw into the joists on one side and then the sheetrock screws into the channels. Because the channels are just screwed on one side they bounce a little – that bounce is a good thing when it comes to sound.

I’m pretty sure we need to put two layers of 5/8″ drywall on the ceiling since the ceiling has a 1 hour fire rating. So there will be more sound proofing foam between the layers of sheetrock and all the mass of the drywall will really help cut the sound as well.

With any luck our tenant will sleep soundly – even when we’ve got guests over…

Update:

Two layers of 5/8″ drywall have gone in on the ceiling and things are MUCH quieter now. They still need to tape and do the wood floor, but so far voices and footsteps are significantly muffled – though still sorta audible. And the resilient channel does indeed help things. When I walk across the floor with heavy boots Dan could tell when I was over the section with channel.