Looking For A Townhouse To Renovate For Under $1.5M?

A lot of the clients who come to me want to be able to renovate a place for under $1.5M. That’s not all that easy to find… The renovated places are usually over $1.5M, and then there are all the places with crappy renovations that are asking $1.1M or more. You MIGHT be able to improve one of those places and keep it under $1.5M, but to really do a nice renovation it’ll wind up costing more.

Yesterday I went through a place that I think fits the bill for people who want a great place for under $1.5M. In fact I think you might be able to do a really nice reno of it for around $1.3 to 1.4M total investment.

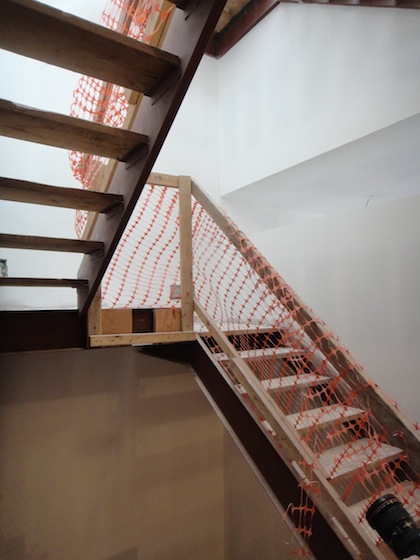
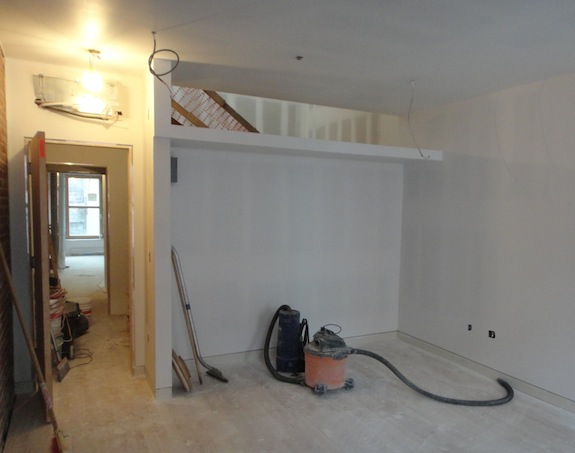
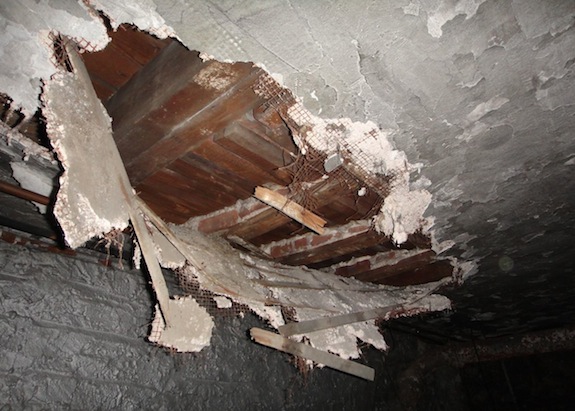
problem ceiling

As you can see in the picture above, it needs work, but it’s got a lot of potential and it’s priced right. I’m not allowed to say which townhouse it is (that would be advertising another agent’s listing – which is prohibited), but I can say it’s not below 125th Street (which a lot of people want), but it is on a charming street in/near a prime neighborhood.

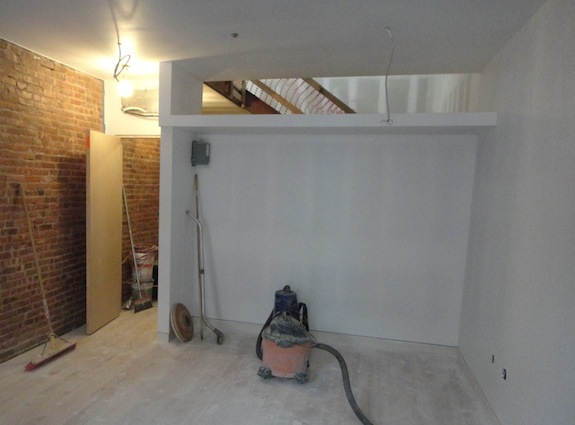
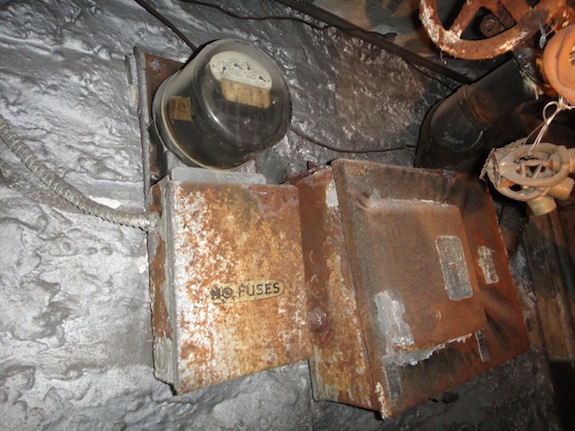
old electric meter

All in all it’s a very doable reno project. It’s got good bones and isn’t nearly as big of a project as our place was.

The one issue is that it does not have a Certificate of No Harassment, but it’s been vacant for years and you could ask that the CoNH be a condition of sale (it could be applied for while you’re working out all the other issues for your 203(k) rehab loan).

There’s another place nearby that looks worse, and might be a bit more work, but also has lots of potential. It’s priced about $1M below renovated comps nearby – so there’s room to do a renovation and still make some money.

If you’re interested in seeing either of these places, let me know…  jay@beatingupwind.com

UPDATE: A week after the first open house, there’s already a contract out on the house mentioned above. I knew it was a good deal 🙂

Our Heating & Cooling Choices

Going into the renovation process we had never chosen a heating and cooling system before. Our tilt-n-turn windows meant we couldn’t have window air conditioners. And when I initially thought through the HVAC choices I wasn’t really in favor of forced air since it tended to be expensive, dusty, and take up a lot of space.

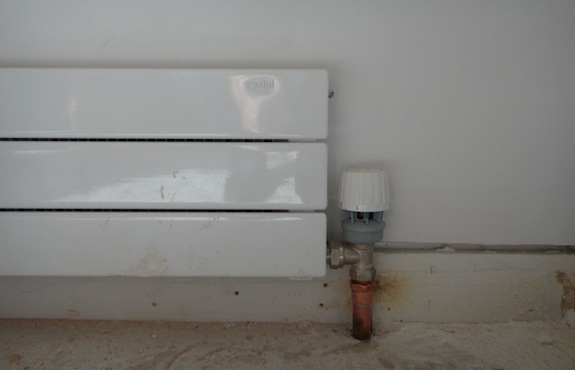
We wound up going with with hot water radiators plus mini-splits. Some of the money we saved going with rads, we spent on expensive European radiators (Runtal). We also didn’t go overboard on a zoned system with lots of thermostats. Instead we opted for pretty simple Danfoss valves. The end result looks like this…

runtal radiator with danfoss valve

The exposed pipes will be painted white when it’s all done. Most of the radiators in the house are two units high – that one is in the rental bedroom wall and shorter than the rest – so to get the same BTUs we have everywhere else we had to go with the model that’s 3 units high.

That’s inherently a pretty low-tech solution – a valve and a radiator. It’s just the radiator looks better than most and the valve is thermostatic – so it’s based on temperature works better than regular radiator valves.

[Incidentally – avoid steam radiators – there’s no such thing as a high efficiency steam boiler. To get high efficiency you need hot water radiators, not steam radiators.]

Because there’s a valve on every radiator we sorta get a zoned system where every room is a zone. It won’t work quite as well as a real zoned system with thermostats for every zone, but it also cost a lot less. And if we stay on top of it, it will probably perform about as well as a more sophisticated system.

There will be one thermostat for the heating system. A friend’s post on Facebook turned me on to the Nest thermostat. If you haven’t checked it out, take some time and watch the promo videos on their site – it’s incredibly cool. I can’t wait to get one.

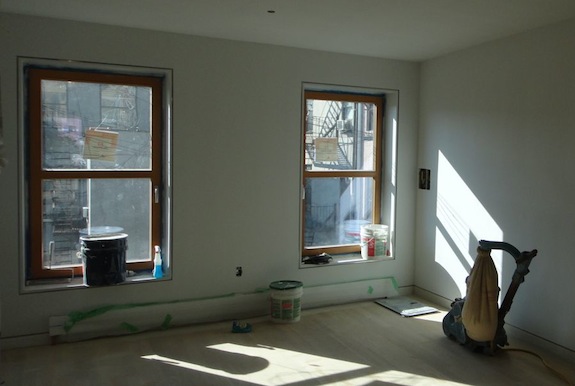
The one “problem” that we’ve realized is the issue of curtains. With radiators under all the windows – if we hang curtains all the way to the floor they’ll cover the radiators…

runtal radiators below windows

That’s a bit of a problem because the tilt-n-turn windows limit our window covering choices. They swing inwards, so putting blinds at the top of the window framing is sorta impossible. We were thinking of doing a lot of curtains, but now worry the radiators won’t work very well when the curtains are pulled.

One area where a forced air system might be better is air exchange. Since the house is well insulated, we may not have enough fresh air entering the house. That is easier to solve with a forced air system – you just incorporate a fresh air intake. But honestly I don’t think we’ll have much of a problem – 2 people in 3,000 sq. ft. shouldn’t be a problem.

We are happy that we have mini-splits and that they’re both heating and cooling. The house is warm enough down to about freezing. It maintains 50+ degrees when it’s in the high 30s outside. That means we probably won’t turn on the boiler until it gets down around freezing. If we just need to take the chill out of the air in a single room (or if our tenant wants it to be warmer than we do) we can use the mini-split.

The mini splits are a bit of an eyesore – we tried to hide them the best we could, but they’re still there hanging on the wall. I don’t think that will bother us too much. To us the visual noise of the mini split unit isn’t any worse than the soffits you often have with forced air systems. If you’re the type who doesn’t want to see a mini-split hanging on your wall there’s always the concealed models you can tuck inside a closet. Those have the advantage of being able to cool/heat two rooms (like a bedroom and an en-suite bathroom) – but the concealed models aren’t quite as efficient due to the ductwork.

One other thing to mention is that we have radiators at each end of the house, and since the bathrooms are in the center of the house we were worried they could get a little cold. We were worried they could get a bit cold, so we put under floor heating pads in each bathroom with programmable thermostats. It’s not very efficient heat, but it won’t be used all that often – so it should be fine.

UPDATE:

Some of the comments asked how the radiator piping was configured. Here’s a diagram to explain how it’s been done…

radiator heating diagram

The model numbers are Runtal unless except where they say Slant/Fin. Since we have exposed brick on one side, both pipes are actually on the same side of the building – right next to each other. There are also valves to bleed air from the system in key locations (such as at the top of each riser). Notice that each radiator / loop has a Danfoss valve on it, so we can (nearly) turn off the radiator in rooms and the other radiators will get more flow.

Bathrooms Are Getting Tiled

We’re definitely on the home stretch – final finishes are starting to take shape. The ceilings are getting painted with their final coats of “ceiling white” and tile is starting to be installed in the bathrooms.

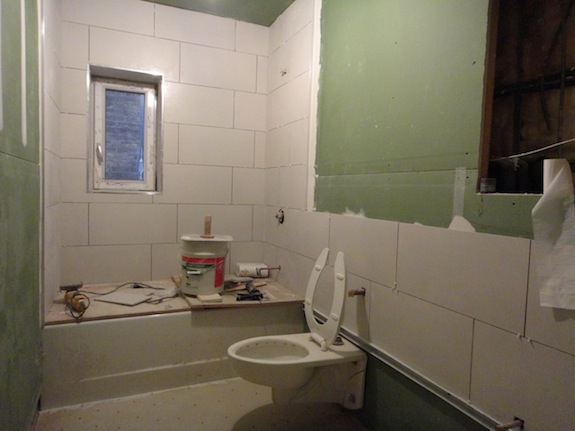
The rental bathroom was the first to get tiled. The guys tile the walls first – starting a bit above the floor. Then they do the floor, and then they come back and do the bottom part of the wall.
rental bath wall tile

In the picture above you can see we’re using 12″ x 24″ porcelain tiles on the walls in a staggered pattern. They’re pretty inexpensive – $5.50/sq. ft. from Italian Tile NYC in Brooklyn. Despite the name of the store, I’m pretty sure the tiles aren’t from Italy. The tile came in unmarked boxes. The Italian tiles almost always advertise that fact on the outside of the box with “Made In Italy” (as required by US import law). Honestly though, I don’t care where they came from – I like them and the quality seems pretty decent.

Since we’re going for a pretty contemporary look, the edges are being finished with Schulter edge trim, not with bullnose pieces. I’ll go into more detail on that in another blog post.

Since that picture was taken they’ve put the electric heating mat on the floor and covered it with leveling cement. I think they’ll be putting the floor tiles down today. The floor tiles will be a Basalt Limestone – which is really dark gray. It looks really good against the off-white wall tile.

The staggered pattern is one of the trends we’re noticing in tile these days. In the past people usually did a linear grid pattern (like a spreadsheet’s grid lines) or they did a brick pattern. The staggered pattern is a bit like the brick pattern, but instead of being offset 50% it’s typically offset by 1/4 to 1/3rd of the length – but not done as a stair step.

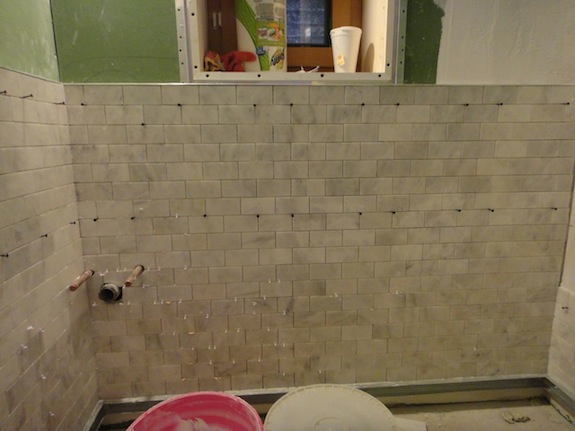
The guy who did the rental bathroom has also been working on the powder room. Here we’re doing 2″ x 4″ carrara tiles on the walls in a brick pattern…
powder room tile

These came in 1′ x 1′ sheets, so they were pretty easy to install. We got them from CarraraMarbleTiles.com over the GW bridge in New Jersey and they cost us $9.95/sq. ft. which is a great price, BUT we’re pretty convinced they’re not actually Carrara tiles, or even Italian (despite what the sales people told us). They also came in white, unmarked boxes… A lot of tile is coming from China these days. Honestly, we like how they look and don’t really care where they came from.

The floor in the powder room is going in today. It’s little 5/8″ Bardiglio squares (a dark gray marble). Again, we’re not sure it’s Italian, but it looks good, so who cares. They’re polished, so it’s a bit “bling” for our tastes, but the powder room is so small it’s not an issue. Plus, it’s just of the living room and tiny – so we didn’t mind it being a little showy.

The tile is also going up in the master bathroom. There we’re doing “Carrara” 3″ x 6″ subway tiles in a brick pattern as wainscoting on the walls, with a mini brick above them just in the shower area. There will be a dark brownish-gray porcelain random brick mosaic on the floor. The carrara subway tiles are pretty inexpensive – just $6.95/sq. ft., however installing them is more costly since they’re individual tiles (not sheets) and the guy who’s putting them in is a perfectionist who’s a bit slow, but they will look great when they’re done…
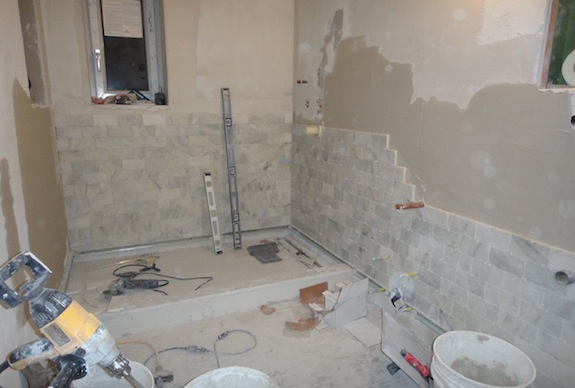
master bathroom carrara subway tile

We had picked out the tile before 105 West 122 sold for $2.85M. Since they’re they high comp in the neighborhood I was glad to see that they also used Carrara subway tile in their bathroom – though theirs is clearly the real carrar – it has much darker grays (though I sorta prefer the look of lighter grays in our tile).

Tomorrow morning we need to run around and buy grout. After renovating the kitchen and bathrooms in our apartment we wished we had insisted on epoxy-based grouts. Epoxy grouts don’t change color, they don’t absorb water, etc. – they’re just far superior. This time we’re going to use SpectraLOCK everywhere we can. It’s an epoxy-base grout that is about as easy to use as the regular grouts (some epoxy-based grouts are really difficult to install). But SpectraLOCK isn’t recommended for use on carrara marble and other natural stones that are light colored and permeable. So on those we’ll use regular Laticrete mixed with “1776” instead of water. The 1776 makes the regular grout more flexible (less likely to crack), more resistant to water penetration, and less likely to change color – not quite as good as SpectraLOCK, but better than average grout.

If you’re contemplating a renovation and doing things on a budget realize that it may be a bit silly to go for inexpensive tile and then pay a lot to have it installed. For example subway tiles are cheap – you can get them for just over $3/sq. ft., but then they’re labor intensive to install. Pay a little more and get something like a marble subway tile that justifies the installation expense. If you’re budget conscious, pay a bit more for something like a nice 12″ x 24″ porcelain that’s far easier and less expensive to install – the total cost should be less than cheap tile that’s time-consuming to install. If you’re cutting the budget to the bone, just tile less of the room – don’t do wainscoting – just tile in the shower/tub area. There’s really no reason to use low-end ceramic tile – there are nice tiles out there that don’t cost all that much and are inexpensive to install – though, from experience – you have to hunt and shop around to find them.
Bulkhead Is Giving Great Winter Light

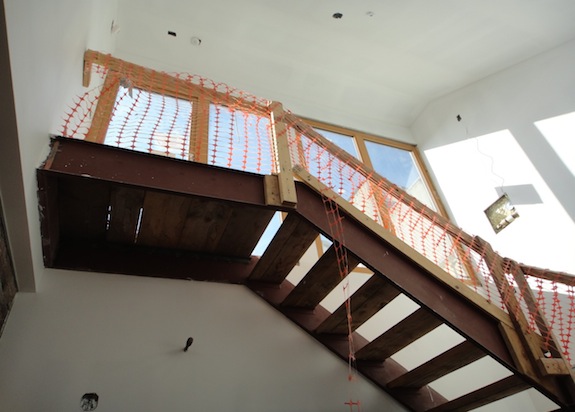
Things are gradually taking shape – the staircase has been primed, so it’s pretty close to it’s final color. The steel needs to be painted, and the side panels need to be put in, but we’re starting to get a sense for the light that the bulkhead brings into the house. We opted for big windows in a bulkhead rather than the more traditional skylight because it should give more light in the winter and less in the summer.

Here’s a picture looking up, showing the bulkhead windows…

light from bulkhead windows

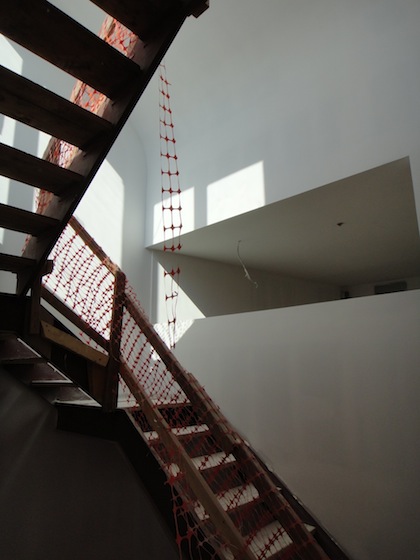
On a sunny winter day the light is really bright right at the top. On the opposite wall there’s the clerestory window into Dan’s “gallery” / “clean studio”…

bulkhead casting light on clerestory windows

It looks really dark below that flight of stairs, but actually it really isn’t… It’s just a bit of a photographic trick since the direct light is so bright it makes other areas look dark by comparison. As you can see below, there’s plenty of natural light one flight down where there’s a clerestory window into the den / TV room on our master bedroom floor…

stairs from 3rd to 4th floors

It’s only below that point that the light bulbs are brighter than natural daylight. [All of those pictures were taken within a few minutes of each other.]

Of course, the light will change when we put in the plexi panels on the sides of the stairs. We’ll either do a milk-white plexi or a frosted plexi – either one will block a lot of the direct light and make the light that gets through more diffuse.

I gotta say, I really like the whole clerestory-over-a-closet detail in the den. I wouldn’t want it everywhere, but it’s interesting. Here’s a couple pictures…

den clerestory window and down hallway

den clerestory window

Those pictures were taken a different day (the stairwell isn’t primed yet in those pictures) – and it was later in the day when there was less light coming down the stairwell. In person the clerestory window has more depth to it, which you can only sorta get from the pictures.

One thing we noticed a few months ago is that on summer mornings, when sun hits the front of the house, light goes from the den into the stairwell – opposite of what we expected. But we’ll need to wait a few months to see that happen again 🙂

And, in case you’re wondering, we’ll be putting wire glass (fire rated) fixed-pane windows into those openings.

Today they’re putting the first of two coats of ceiling white on the ceilings. And they’ve started tiling the bathrooms – I’ll do a post on that soon…

Art & Exposed Brick Walls

We like art. When we move in our walls will definitely not be bare. Plus, Dan has an MFA in sculpture from Cranbrook – that’s sorta the point of the entire top floor (his art studio). So one of the issues we had to resolve was hanging art on the exposed brick walls. We didn’t want to be putting nails into the brick, so we needed an art hanging system. Our solution looks like this…

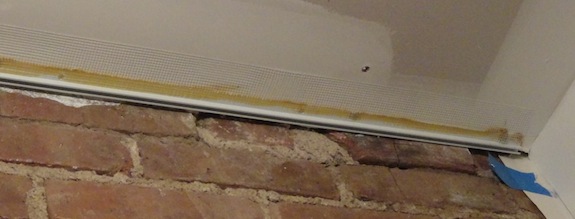
picture hanging track

There’s some cleaning up to do (joint compound on the brick), but you can see the thin track right along the brick. There are special hangers you put into it that let you hang art – up to 65 pounds per hanger.

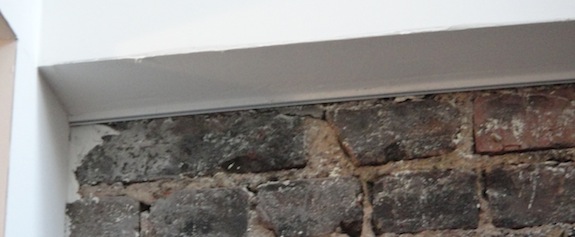
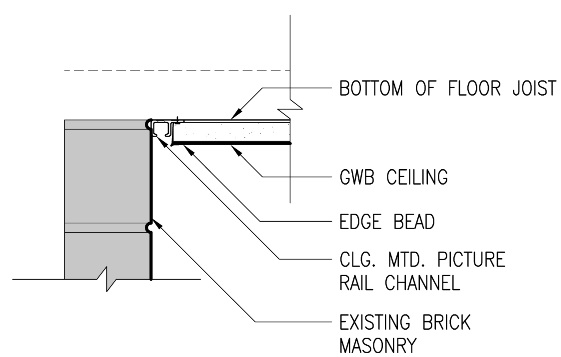
We did it a little differently than the architect planned. He proposed it be recessed a bit and hidden…

But the problem with that was that it was impossible to get the hangers into the track with his solution and even if it had worked, it was a lot more work for our contractor. Our solution is easier and since the track is so minimal it still looks pretty good.

Here it is going in. it has a flange to one side that gets taped and mudded to the drywall…

picture track installation

There was another type that could have worked well. It was much bigger and was made to go next to 5/8″ drywall. It would have worked, but it was 2 1/2 times the price and still only held 65 pound – so we stayed saved some money and went with the smaller one.