My apologies for not blogging lately… When we moved in I just sorta crashed, but the workers are still making good progress. They’ve been working on the stoop for what seems like forever…
We were going to have a sub-contractor do the work, but one company wanted to charge $53,000 (just for the stoop), and the other one kept missing and being seriously late for meetings (not a good sign on a critical path task). So our contractor is having his guys do the work.
The process starts by taking a jack hammer to the old brownstone, removing any loose stone, and creating a rough surface…
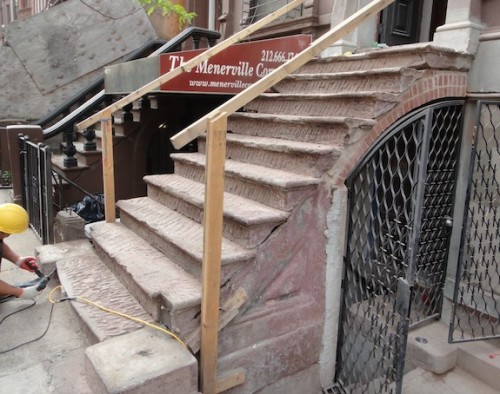
In some cases that’s quite a bit of stone (see below) – it all depends on how much damage there was over the years…
The next step is to coat everything in a bonding agent so the concrete-based mix they put on will adhere to the brownstone – that’s the while stuff in the picture below…
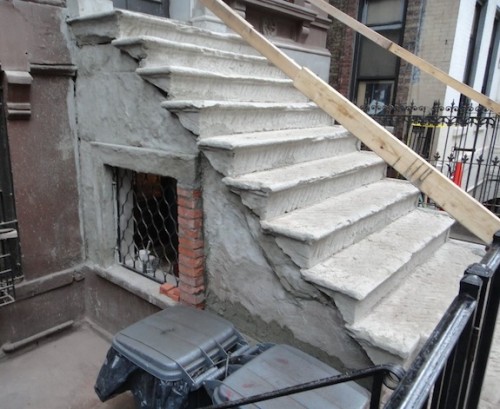
Then everything has to be built back up. For the stair treads they used PVC piping to create round edges…
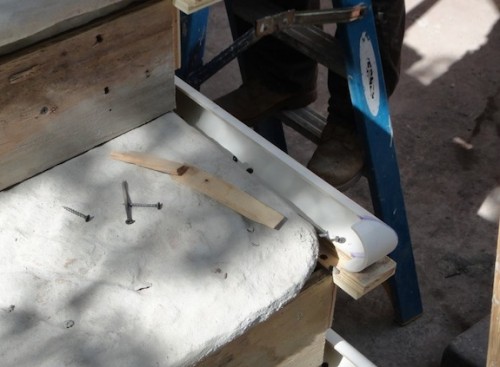
That was filled in with concrete to form a new edge. When they did the front they embedded wire in the concrete to reinforce the leading edge of the step.
The flourishes under each step also had to be reconstructed…
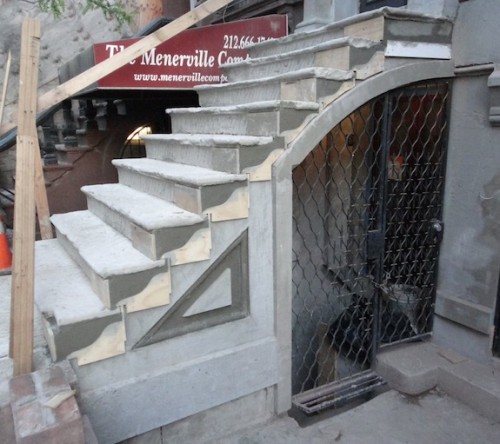
You can also see how they’ve recreated the triangular detail on the side of the stoop. It was a multi-stage process – you can see the picture below has more detail in the design than the one above.
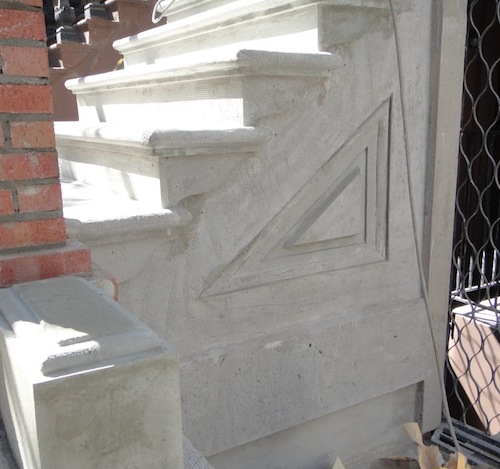
In the picture above everything is ready for the final “brownstone” finish coat. All the concrete work has a very coarse finish to it that’s not quite visible in the picture.
You can also see that they’ve recreated the low walls that were there originally.
Simultaneously to that another worker has been grinding all the rust off the original ballusters (and the ones we bought at Demolition Depot to fill in what we were missing), but that’s the subject of another blog post.
We had a hard time figuring out what to do with the newel posts. A building on 122 was willing to sell us their newel post and railing, but the price was high, and it didn’t give us everything we needed and it was only one newel post and one section of straight railing (plus a bunch of ballusters we didn’t need). In the end we decided to do masonry newel posts since it was less expensive, quicker, and what the National Park Service has approved (though we made a few changes to the approved design).
The first step in building up the newel posts is building up a brick core…
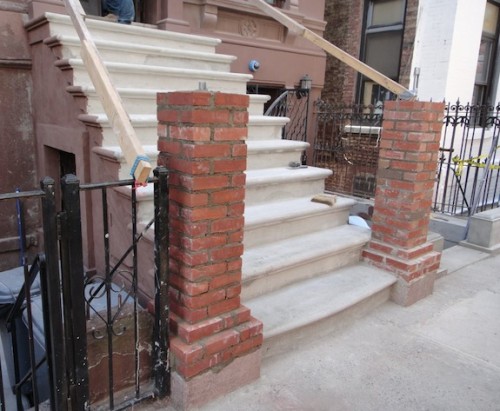
Then forms are built in the shape of the final design, and those are put over the brick cores…
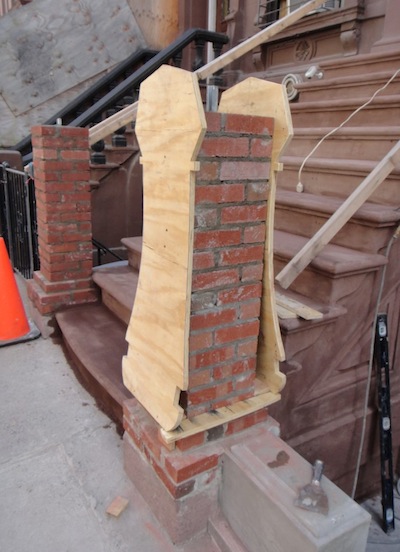
Then concrete is put on the brick and a straight edge is drawn down guided by the templates to make the concrete into the correct shape…
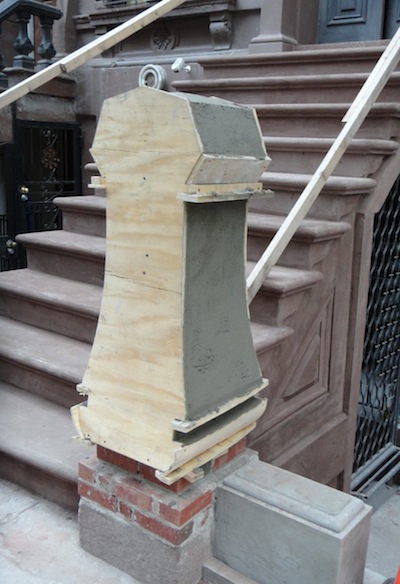
That’s where we stand as of today. Tomorrow they’ll take off the forms, do the other sides and repeat the process with the other newel post.
The other thing you can see in the picture above is the brown primer for the final “brownstone” coat. They did a sample area of the finish today…
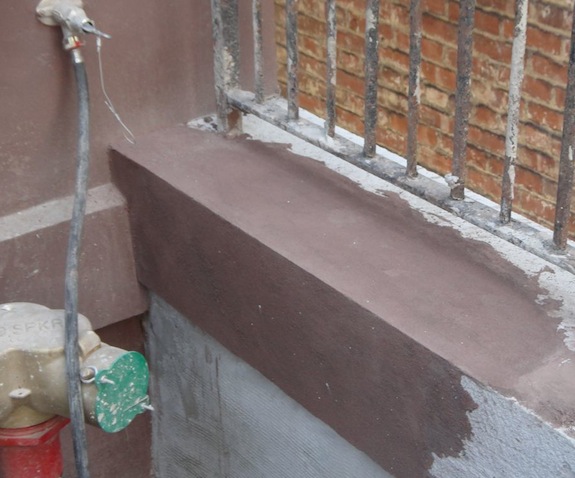
The house wall is painted, the retaining wall has the “brownstone” finish. It’s not the same quality as the $10M townhouses you see on the Upper West Side, but it’s better and hopefully more durable than a lot of what we see around Harlem. It doesn’t look like brown sandpaper. It looks better than brown stucco, but almost has a paint-like quality to it – though it has more of a texture than paint.
I think the newel posts will be painted (black), and not have a brownstone finish – that should make them look more like the cast iron originals. There are actually brownstones on 119 just east of Lenox that have all concrete railings, ballusters and newel posts. At first glance they pass for original, though when you get close you can see a concrete texture and as they age they get lichen in the crevices…
One thing I should mention is that we’re not refinishing the under side of the stoop because if water gets through the new finish on the top, it needs to be able to go through the stone and get out.
So we’re getting there… I just want them to be done though… But soon enough they will be done.

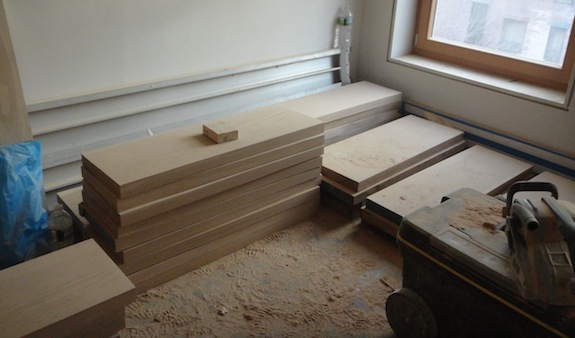
 Friends are about to start renovations on their South Harlem brownstone. Their place is a total wreck and there aren’t enough original details to warrant a renovation with a traditional aesthetic. Still, there are some original details left and instead of just throwing them out they let