We have very little in the way of original details. The only place where we have original details is on the front façade. Our goal is to have a pretty traditional exterior and a completely contemporary interior.
The main front door to the house (parlor level) has been a big question mark. Initially we were going to do a completely contemporary french doors with a transom over them, but the NY Office of Historic Preservation nixed that idea because they see the front door as one of the most important parts of our entire house. So we opted instead for recreating the original doors. 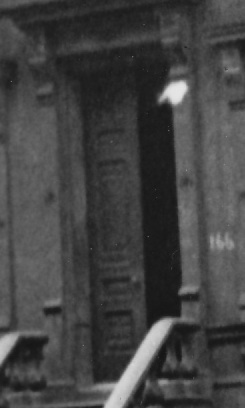 The problem with that was the picture to the right was only record of what our doors might possibly have looked like – and it’s a rather fuzzy picture and of our neighbor’s place, not ours. Also, it appears the door was originally all wood but we want some glass in our door. We figured if we tried to recreate the panel pattern, that Historic Preservation might let us get away with having some of the panels be glass instead of wood – but that was a gamble.
I always had using doors salvaged from another townhouse as an option in the back of my mind. We had been to Demolition Depot last year and I had seen doors that seemed like they’d work. They needed to be restored, but they were more or less the right size.
Dan was skeptical – he was convinced things at Demolition Depot would all be in horrible shape or we wouldn’t find the right size. I got him over there the other day to “look at how old doors were constructed” and luckily the doors I had seen last year were both still there. We took our contractor over to look at them and he’s game for using them. I also checked with historic preservation and they said it’s OK to use an old door – though we’ll need to submit an amendment.
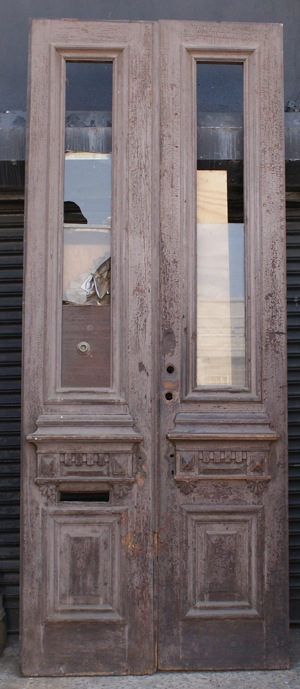 The top contender is the door to the right. It’s the perfect size – 48″ wide, 119″ tall. It’s also in relatively good shape – though someone did cut a huge mail slot through the door at some point, but recently we’ve been thinking we’d go with a mail slot in the door instead of a mailbox – so the mailslot is OK with us.
It’s also got glass – which we’re really happy about. Now there’s no problem with historic preservation about having glass in the door.
The plan is to restore it and put new beveled, leaded glass in it. It should be pretty spectacular when it’s done. The question is whether to paint it or stain it. Dan really wants it stained, but I don’t think that’s practical. I think the repairs will be too visible if it’s stained. I think the way to go is to paint it.
Here are some more pics of it that we took – you can see the details a bit better as well as what the inside of the door looks like… (UPDATE: Now, newer, better photos…)
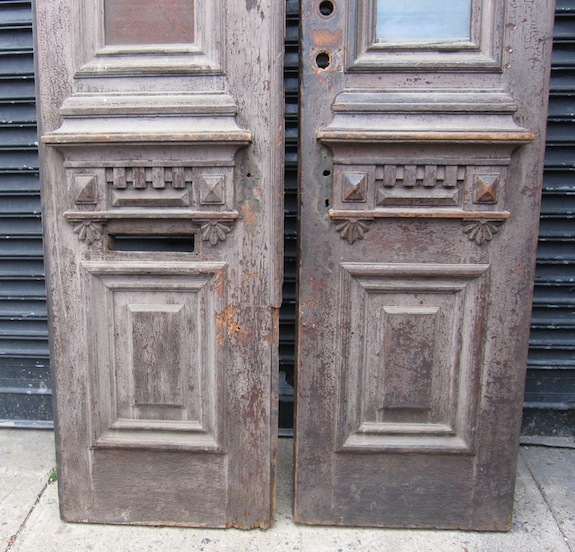
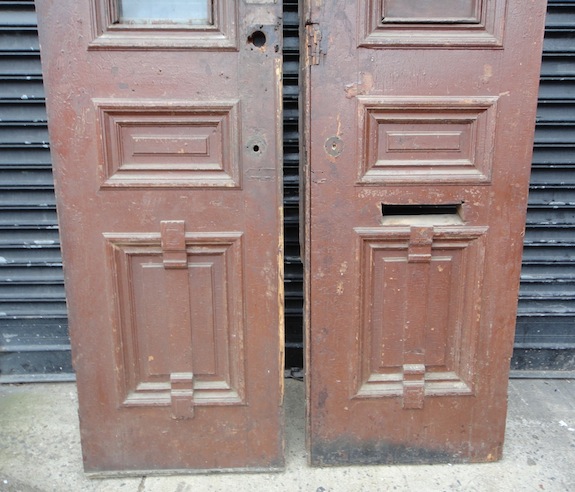 I love all the detail. I just don’t think we would have gotten that level of detail if we had had a new “replica” door built.
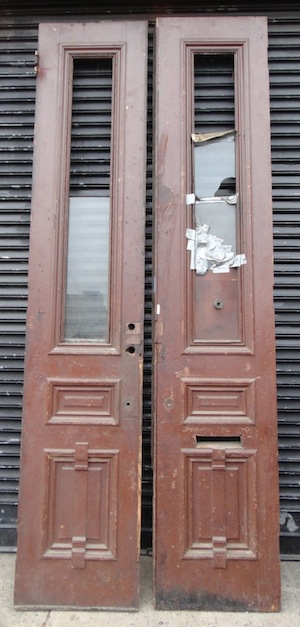
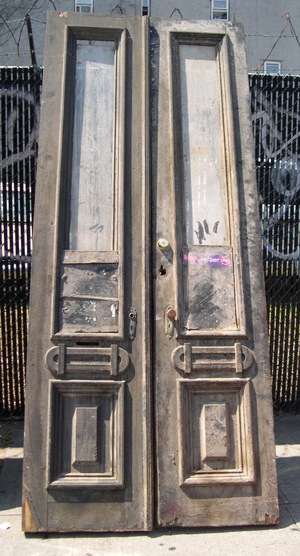 There is an alternate door we like as well. it’s an inch and a half wider – so we’re not completely convinced it would fit. At a minimum we’d probably need to trim it down. The windows on it start lower, which would be nice since it would let in more light, but I sorta like the detail on the other door better. Plus this door seems to be laminated – probably a thin layer of something like mahogany over oak. The laminate could prove to be difficult to restore. And if you’re just painting it when you’re done it’s not really important whether it’s mahogany or oak. Still, it’s also a very cool door…
All in all I think it’s sort of exciting to give old doors a new life. One of the principles of historic preservation is to not introduce “fake original details”, but clearly there’s an exception when you’re using doors another similar building in your neighborhood. Also, I think the decision might have been different if other of our sibling townhouses still had their original doors. Since all of them lack their original doors, there’s no continuity problem.
One thing I should mention… The old doors aren’t as airtight as new doors would be. One decision we made a while back was to consider the vestibule to be exterior space. We’re going to insulate the walls of the vestibule as if they were exterior walls. That means the main doors can leak as much air as they want and it won’t affect our heating/cooling bills. The interior set of doors will be proper, factory-made, contemporary doors that will be airtight.
It looks like we’re also going to get some balusters for our stoop railing from Demolition Depot. Unfortunately they don’t have the railing to go over them – so we’ll have to have that fabricated.
UPDATE: The one I mentioned as the “top contender” is the one we purchased. The size appears to be absolutely identical to what was in there originally – it’s a bit uncanny actually. Now we have to figure out the mail slot, the door knobs, the locks, etc…
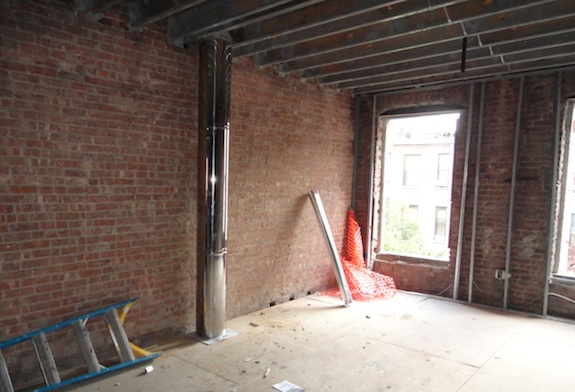 We could have framed it out and put sheetrock around it, but that amount of sheetrock on an exposed brick wall would have looked weird and it would have taken up more floor space than the bare chimney does. It’s a little unexpected, but looks pretty good…
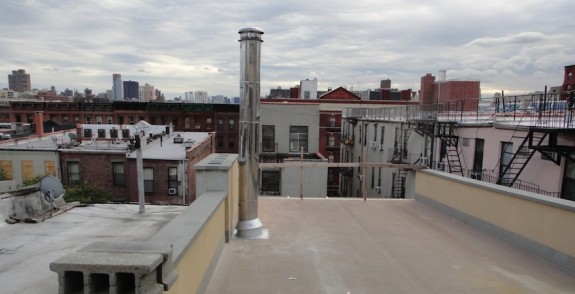 That picture is sort of also a gratuitous pic of our skyline view (you can click to see a slightly bigger version).
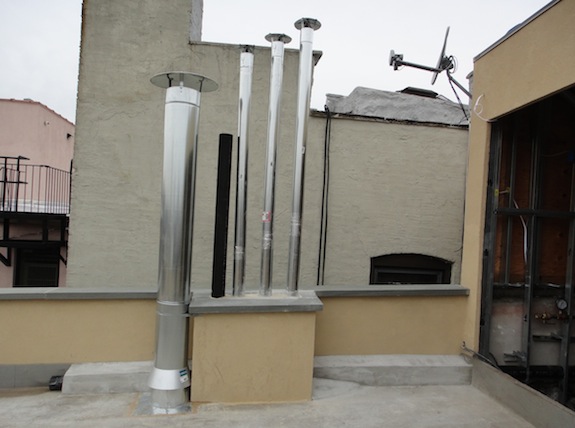 Going from left to right that’s 1) the rather huge exhaust vent for Dan’s art studio, 2) the plumbing vent, and 3-5) bathroom vents, boiler chimney, and hot water heater chimneys (not sure which is which). It’s a lot of stuff, but it’s gotta be there… You can also see the drain pipe for the front portion of the roof snaking past the vents.The roofer will be by soon to clean all of that up and make it water tight.
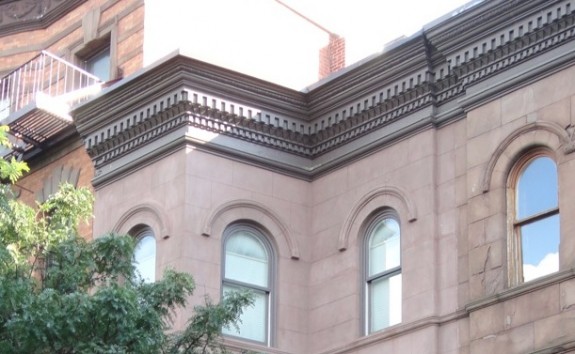 To my eye that’s a bit of a brownish gray. There are also some handsome gray cornices at the other end of our block – 102 and 104 West 123rd both have gray cornices…
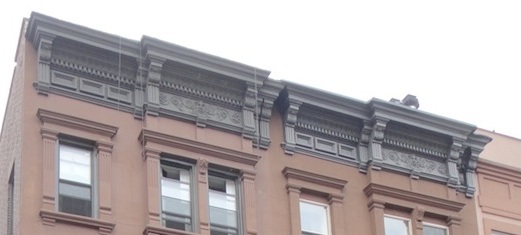 As you can see 102 (on the left) has more of a taupey gray and 104 has more of a bluish gray. Personally I don’t really like the bluish gray so much. I like a taupey or brownish gray..
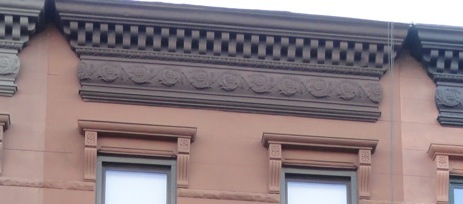 But the color we’ve decided to go with is black…
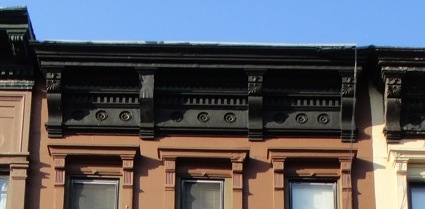 That means our building’s hat (cornice) will match it’s shoes (stoop railings and basement grill work) while the windows and basement doors will just blend in with the brownstone. The only down side is that it will be a pretty somber/formal color combination.
 The problem with that was the picture to the right was only record of what our doors might possibly have looked like – and it’s a rather fuzzy picture and of our neighbor’s place, not ours. Also, it appears the door was originally all wood but we want some glass in our door. We figured if we tried to recreate the panel pattern, that Historic Preservation might let us get away with having some of the panels be glass instead of wood – but that was a gamble.
 The top contender is the door to the right. It’s the perfect size – 48″ wide, 119″ tall. It’s also in relatively good shape – though someone did cut a huge mail slot through the door at some point, but recently we’ve been thinking we’d go with a mail slot in the door instead of a mailbox – so the mailslot is OK with us.

 I love all the detail. I just don’t think we would have gotten that level of detail if we had had a new “replica” door built.
 There is an alternate door we like as well. it’s an inch and a half wider – so we’re not completely convinced it would fit. At a minimum we’d probably need to trim it down. The windows on it start lower, which would be nice since it would let in more light, but I sorta like the detail on the other door better. Plus this door seems to be laminated – probably a thin layer of something like mahogany over oak. The laminate could prove to be difficult to restore. And if you’re just painting it when you’re done it’s not really important whether it’s mahogany or oak. Still, it’s also a very cool door…
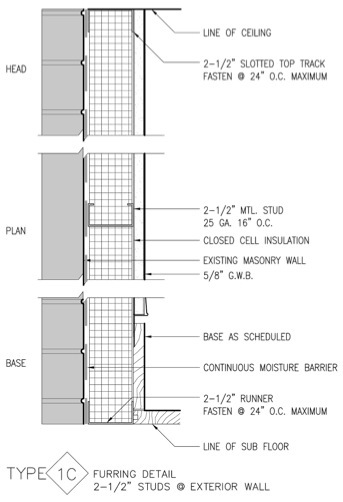 Notice his note for a “continuous moisture barrier”. Basically “moisture barrier” is a fancy term for a sheet of plastic – there’s not much high tech about it.