More Progress With Stairs

The contractor took a 2 week break which is why I haven’t been posting much about things getting done at our place. The delay is because the plan examiner we have at DOB reviewing our sprinkler plans is pretty awful at his job. He gave us an objection for having 68 heads on a 3″ water main connection when there aren’t 68 heads – there are 38. Even if we did have 68 heads the size of the water main connection is irrelevant if the calculations are based on pressure and flow (which ours were). He’s also more concerned about formatting than substance. We had a 2 week delay because he didn’t like the formatting for the sprinkler head schedule. Initially he said we didn’t have a schedule at all – when we did. Then he said the schedule our mechanical engineer came up with wasn’t formatted properly when our mechanical engineer does sprinkler plans (that get approved) all the time. He also basically refused to tell us whether we had all the paperwork in that we need to have in. Monday morning we have yet another meeting to try to get him to approve the plans. Hopefully he won’t come up with some new objection or piece of paperwork that delays us another two weeks. The problem is that by looking at the form of things rather than the substance, plan examiners like him can miss important items. They don’t do anyone any good.

This past week work resumed and the most noticeable thing that got done was stairs. Another story of stairs went in and temporary treads went in all around. Here’s looking down – you can see the the progress so far…

steel & wood stairs from above

When it’s all done the steel will be painted white and there will be white oak treads. We were thinking of doing a gun metal blue finish on the steel, but it was complicated, rust prone, and visually it was a distraction. The stairs are supposed to be about the plexi side panels and the old joists that will create a screen along the stair hallway. A gun metal blue finish on the steel would have been distracting.

Here’s looking at parlor from the kitchen (in the front of the building), towards the dining & living room in the rear… (the temporary construction stairs are finally gone).

Steel & wood parlor stairs - looking from front to backAnd looking the other direction from the living/dining room towards the kitchen…

Parlor stairs looking towards kitchenYou can’t see it clearly, but there will be a bathroom under the stairs.

That steel was done before we decided to paint the steel. On the floor above they’ve primed the steel so it looks red…

Steel stairs primed redAnd looking from the other corner you can see down the stairs more easily…

Steel stairs going from 2nd to 3rd floor in Harlem townhouseProgress has also been made with the stairs in the rental unit going from the basement to the cellar. I’m not sure why they’re not in completely, but here’s where things stand so far…

Wooden cellar stairsThe contractor also put the gutter and downspout on the building, which will stop much of the water from getting into the building. Rain water was sheeting off the roof and hitting the window sills as it went down the building at which point much of it was getting in the building.

A few other things have gotten done but those are the major items. Hopefully we’ll get our sprinkler approval on Monday at which point things will really pick up again.

Before & After: Repointing The Back Wall

They haven’t taken down all the scaffolding in but it seems they’re done with repointing the rear façade and things are looking leaps and bounds better than they did when we started the project…

Here’s what it looked like initially…

Rear wall on townhouse shell in Harlem

And here is what it looks like after the repointing is done…

Ground floor rear repointed - townhouse renovation

There was so much garbage in the yard when we started you couldn’t even see the cellar windows! It’s looking very neat and tidy now – as it should… And notice that you can’t even tell where the opening for the air conditioner used to be. There used to be parts of that wall that I thought could collapse – that’s no longer the case – it’s back to being a completely solid wall.

Here are some other before and after shots…

dilapidated rear wall on harlem townhouse shell

stucco falling off harlem brownstone shell

And what it looks like now…

Repointed rear brick wall on Harlem townhouse

The one thing that didn’t quite go how we had hoped was mortar color. The original color was a pinkish yellowish tan color that looked very sandy and had a high lime content. They just don’t make mortar like that anymore. Well, they can, but there are better ways of making mortar (with cement mixed in). The issue is that the base color of modern, cement-based mortar is gray, not a tan/sandy color. I’m not sure we could have achieved the original color if we had tried. Dan wanted to mix red into the mortar so the mortar would be closer in color with the brick, but even that wouldn’t have been the original color. In the end the contractor just went with the standard gray color. If it were a front façade I think we would have been pickier about the color, but the fact of the matter is that it’s the back of the house and it looks fine.

One thing I should mention is mortar type. There are several types of mortar and they vary by how strong they are…

Type M: 2,500 psi
Type S: 1,800 psi
Type N: 750 psi
Type O: 350 psi
Type K: 75 psi

You would think stronger would be better, but on historic structures the opposite is actually true. Old bricks are softer than modern brick and if you use a mortar that’s stronger than the bricks, when the wall needs to move the weakest part of the wall will be the bricks and they’ll crack before the mortar. That’s the opposite of what should happen – the mortar is supposed to give way before the bricks. After all, the mortar isn’t that difficult to replace, but the bricks are historic – you want to preserve them. You may think it’s not a big deal but think about the fact that a southern facing wall, like our rear wall, will expand slightly every afternoon due to the sun’s heat and then contract at night. Over time that can destroy your bricks if your mortar is too strong. Typically Type N mortar is what should be used on late 1800s townhouses like those in Harlem. Type S and Type M should never be used in walls with historic brick.

Finally Making Real Progress With The Staircases

The staircase in our unit has been a bit of a hassle. The guy fabricating it does good work, but he’s not a big fan (or follower) of plans. Explain what you want to him and he’ll get it done, but when the architect insisted on shop drawings he resisted. I remember one time there was a panicked call about the stairs (“the architect miscalculated”) and I rushed down to the job site just to find that the confusion was easily cleared up by looking at the plans where it was all quite clearly laid out. Stuff like that has happened more than once – now I just take it in stride.

Anyway, when the stair guy resisted shop drawings it was with the proviso that if he didn’t have shop drawings he’d have to correct whatever we didn’t like. So in round one he did the stairs the way they were laid out on the original plans and delivered them to the job site the day after the architect had figured out there was a design flaw and they couldn’t be done that way. So the stair guy just put everything back in his truck.

In round two we discussed doing them one way but in actuality they couldn’t be done that way because the steel had to be cut at one point and it was cut so much it was too weak. It was something that would have been discovered with a shop drawing, so 2 of the 3 runs of the stairs had to be removed and redone.

Yesterday they put in their third attempt – and indeed the third time is a charm – only minor changes needed. Here’s what they look like…

Constructing parlor stairs out of steel in Harlem brownstone

You’re looking from about the entry way. To the right in the foreground is the kitchen. Under the stairs against the wall will be a powder room which is turning out to be surprisingly big. Beyond the stairs is the dining room and then the living room.

Now that we’ve pretty much resolved the issues with the stairs, the rest of them should go much faster since all the other floors are pretty much just like the first floor. I think initially they were saying he could do one floor a week. So we could have them all in by the first week of August. Actually, as soon as this first flight is done the workmen can get the bath tub up to the guest bathroom and install it. That will  be cool…

Last time I mentioned the stairs I said Dan wanted them done in gun metal blue. That’s a really fussy thing to ask for. It has to be finished on site and it’s prone to rusting even after you put the finish on. This morning our architect mentioned another possibility and Dan and I both sorta like it… Paint the steel white (instead of having a gun metal blue patina), then have milky white plexi side panels (instead of clear). The side panels will be in these swoopy organic shapes, so the architect’s approach de-emphasizes the structural components (the steel) and puts the emphasis on the panels. We like that change. We also like that it reduces the color palette in the stairwell (always a good thing). The downside is that at the top when the stairs go up to the roof the milky white panels will block more light from the bulkhead windows  than clear panels would. And at the bottom on the parlor floor the milky white panels will make the space feel more chopped up. So we’re thinking about it for a couple days…

They’re also starting to make progress on the staircase in the rental unit. That will just be a standard wood staircase – nothing complicated about it…

Progress on stairs in rental unit

You can see the platform has been framed in. There will be stairs going up and down from there. You can also see that the stairs are open to the cellar “storage area” (media room / work room).

There will be a door to a closet / storage area under the stairs (barely visible in the photo), and a small door to get to the less accessible space under the stairs (which is quite visible in the picture. One huge plus about the rental apartment is that it will have tons of storage. There’s a huge laundry room with plenty of space for storage, plus all the space under the staircase, plus two closets on the ground level. Hopefully that will make it stand out compared to most New York apartments that have just tiny amounts of storage space.


Cellar Storage Area Gets Walls

We stopped by the house yesterday and noticed the cellar storage area now has walls. We have this unusual arrangement where there are two entrances under the stoop – one to the cellar and one to the basement/garden apartment. That means we can have a storage area and a utility room in the cellar and not have to go through the tenant’s apartment to get to them.

The boiler/utility room feels huge – probably far bigger than it needs to be. The storage area feels a bit small – I probably should have pushed the architect to take space from the boiler room and given it to the storage room, but that is what it is… Unfortunately the utility/boiler room is too far from the lot line to have things like sprinkler control valves – they’re (unfortunately) going in the “vault” area (the area with a vaulted brick ceiling under the “front yard”).

Here’s a picture looking back. That’s the new cinder block wall between our storage area and the boiler/utility room.

Cellar storage area with rock and concrete block walls

We’re leaving the rock walls (foundation) pretty much as they are – not framing them out or anything. That will make it a bit chilly down there in the winter. The wall to the right is actually has air on the other side since the apartment building next door has a below-grade alley way.

There’s graffiti on the rock foundations. In the boiler room there’s a stick figure of a person. To the left in the picture above and to the right in the picture below there’s the words “NO DOPE” – from back when it was a drug house. I think we’ll leave those – just clean the dirt off gently. It’ll be a pretty grungy looking space – but all those layers just give it character. We have to Sheetrock the ceiling (with fireproof Sheetrock). We’re thinking of painting it medium to dark gray – the space is just too grungy for a white ceiling.

And here’s a picture looking forward – you can see how the stairs come down into the cellar from outside. (There will be a wall in there soon.)

Cellar storage area with entrance under stoop

The door was one thing the architect didn’t quite get right, but the contractor caught the problem. The architect had the door in line with the wall, which would have put it in the middle of the stairs. The contractor caught the problem and said we need 36″ of clear space at the bottom in front of the door. The last two steps are a mess and will be rebuilt. It’s a bit of a spooky space to walk down into, but we’ll have a light at the bottom that’s on a motion sensor.

Here’s an somewhat older picture of the other corner of the room and looking into the vault area. There’s a lot that’s going to be going on there. We’ll have gas and electric meters on those boards (we refused to have them outside the building for aesthetic reasons). Then in the vault room along the wall you see will be this huge contraption for sprinkler control. Hopefully all of that will get installed in the next few weeks.

Electrical meters going into cellar near vault room

UPDATE:

Yesterday I realized the wall wasn’t constructed quite right. There’s supposed to be a 4″ concrete dam at the bottom to prevent something like a hot water tank failure from flooding the rest of the cellar. But it’s too late (unless we ask them to tear down the wall and redo it). On the plus side we were able to get a floor drain into that area (which was unexpected), so maybe my fears of flooding aren’t really an issue. We’ll let the architect make the final determination – but I’m guessing no 4″ dam…

UPDATE #2:

The walls are now complete. Here are some pictures… First the new wall and door at the bottom of the stairs to the outside of the building (under the stoop)…

Concrete wall around cellar stairs in Harlem Brownstone

And here you can see the actual staircase…

Stairs to cellar in Harlem Brownstone

They reconstructed the bottom three stairs – there were only two originally and we lowered the cellar floor a few inches.

Here’s the completed wall between the storage area and the mechanical/boiler room…

Concrete block wall between storage area and mechanical room

Notice there’s no lip below the door – that entire wall should rest on a 4″ high concrete dam that prevents flooding of the entire basement. We’re now not too concerned – there’s a floor drain in the mechanical room which will prevent any real flooding. If we need to we can put a dam inside the room to keep any leakage from the hot water heaters and boilers from flooding into the rest of the cellar.

We Have A Proper Roof! (+ other progress)

We were away for 10 days – up in Toronto visiting friends and family. While we were gone (and in the days since we got back), a number of things have been accomplished.

The Roof

The biggest thing that got accomplished was the roof – it’s now water tight (and looks great)…

Townhouse roof with Kemper system

You can see there’s a strip there along the side that’s not quite finished and there will be additional pipes coming up through the roof, plus the bulkhead roof needs to be done. At some point they’ll come back and finish off all the little details, but by-and-large it’s done.

The architect was pleasantly surprised – he had spec’d a more traditional, less expensive roof, but the contractor decided to upgrade us to a Kemper system. The Kemper system is a spray-on resin-based roofing system. It’s quite durable and if you put enough layers of it on they’ll give you an no-questions-asked 30 year warranty. Given how expensive it is, we’re just going with the regular number of layers.

The color is light and fairly reflective, but not white or one of the approved EnergyStar colors. NYC’s white roof rule goes into effect next year. I’m not sure whether we’ll be required to have a different color or not. The contractor has said that if DOB cites us for an unapproved color he’ll paint the roof. The gray does mute the yellow-ness of the stucco somewhat. All in all I think it looks pretty good.

What you can’t see is that under the visible roof are two layers of 2″ rigid foam topped with rigid, waterproof board. That means the roof it currently at about R16 – on it’s way to R39+.

After we get the C of O we’ll flesh out the roof into a proper roof deck. We’re still trying to figure out what’s allowed in that respect and how we want it to look. We really want an ipe deck, but while it was legal for a while there, apparently it’s not technically legal (though apparently it’s very resistant to fire).

The Stairs

Stairs have been a bit of a problem. The guy who’s making them does good work, but he’s not big on formal plans – which is a bit of a problem. The architect wanted him to do shop drawings and long story short he started fabricating before the shop drawings were done and then had to rip out his first attempt. Now he’s on his second attempt and it needs some major revisions because there are details he encountered that should have been worked out in the shop drawings. We’re hoping third time’s a charm. Here’s how they look currently…

Steel stairs going into a Harlem townhouse

The reason they’re rusty is because Dan wants the stairs to have a gun metal blue finish. Once they’re installed they’ll need to be sanded down and finished with the gun metal blue (and possibly waxed). It’ll be a pretty big job, but it will look great when it’s done.

Cleaning and repointing brick on Harlem townhouse
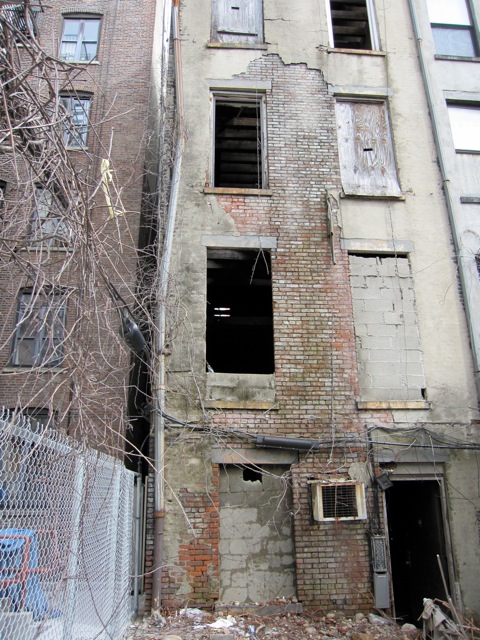
Repointing The Rear Façade

As we looked at townhouses before buying ours I frequently saw renovated townhouses that had beautifully restored brick façades on the back. We’re starting to get to that point ourselves. The contractor has put up scaffolding and is chipping off the old stucco and cleaning the brick. Next week he’ll start repointing. We want to have the the same color mortar that was there was there originally – which was slightly yellowish and pinkish. The brickwork in the house is actually really beautiful when it’s clean, so I have high hopes for the back wall.

Other Progress

Electrical and plumbing work continued while we were gone. And we finally got the window order in on Wednesday. I have a feeling windows will be an issue since they could come in pretty late – probably mid-September. The finishing work (floors, Sheetrock, etc.) can’t be done until the house is sealed up.

The thing that’s holding things back right now is sprinkler approval. We were pleasantly surprised when we were on vacation because the DEP approved our new water main connection much earlier than expected (“only” took a month – rather than the expected two months). But the water main contractor won’t proceed until the sprinkler plans are approved. The earliest that can happen is this week. We’re crossing our fingers about that since all the utilities depend on it since ConEd won’t put in gas and electric until after the water main is done.