Parlor Stairs, Lightwell/Footing & Roof Deck Taking Shape

Things are still progressing a little slowly, but nevertheless a few things moved forward in the past week…

The Roof Deck Area

The roof deck is starting to almost look complete. Soon the only thing that will be missing are the windows/door (and some lighting). It’s sorta calming to have something that’s almost “done”.
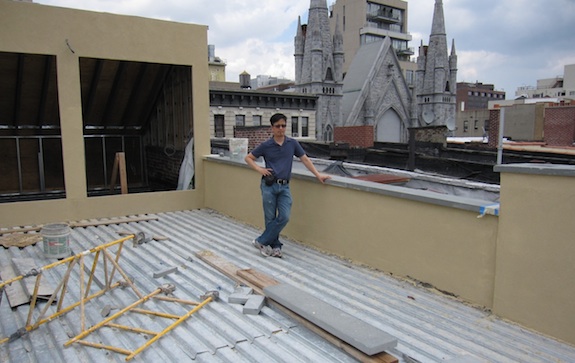
roof deck almost looking done

Pretty much all the stucco is done. The new bluestone cap stones are in place (and look great). We were wondering what color the roof should be. There are  a number “cool roof” options, but seeing the stone and the stucco we’re agreed the roof should be a light grey. The stucco is actually more yellow than it looks in the picture – somehow the bluestone really brings out the yellow in it. So the gray will keep the color palette fairly simple.

The Back Porch Footing / Cellar Lightwell

Another thing that went in quickly and is looking semi-complete is the footing for the rear deck, which is also the lightwell for the cellar windows…
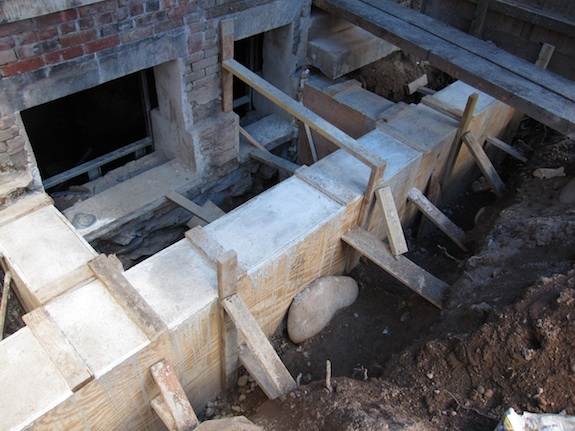
footing / lightwell

As you can see, the rear deck off the parlor isn’t very big – just 4 feet deep – enough for a couple chairs, but real entertaining will happen in the garden.

I was a little worried about the lightwell/footing affecting the view from inside, but it’s not bad – all the dirt in the picture below will be graded level and we’ll keep the plants in that area pretty low so the tenant should still get decent light.
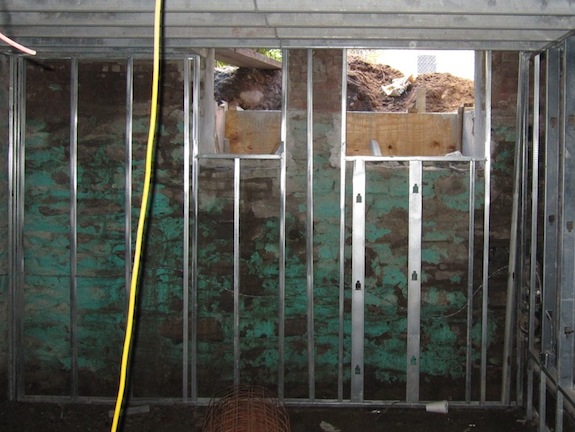
lightwell not blocking view too much

The closer you get to the window the more sky you get, so what you see in the picture is a worst case scenario, though the window framing will take a fair amount of the space you see now.

Owners’ Unit Stairs

The other thing which has progressed are the stairs in our unit. It’s actually a bit of a long story… At one point we wanted a closet opposite the stairs, so the stairs had to be configured differently than they were above, and to get enough height to have a powder room under the stairs the stairs intruded into the kitchen. Then we got rid of the closet in order to have a more open feel on the parlor floor (we’ll just use coat hooks) and we didn’t really think about the fact that that would let us change the configuration of the stairs.

The architect had said at one point that he wanted the stair fabricator to do shop drawings. He sarcastically said “if you don’t do them you’re going to wind up refabricating things when there are problems”. The contractor and stair fabricator took that as a viable option (it’s amazing how much the contractor does and has to redo when it conflicts with something else – it’s just how they work). Long story short the architect later insisted on shop drawings and offered to do them himself, but the fabricator started working before the shop drawings were done. Then the architect realized there was a headroom clearance problem where the stairs intruded into the kitchen so he told them things needed to change. The next day the fabricator went and started installing what he had already come up with, which of course was a problem. Luckily they had agreed to redo things if there were problems so he had to cart away the first set of stairs and come up with a new set.

Now the stairs are configured just like all the other stairs in our unit, though they’re slightly steeper to get clearance under the stairs for the powder room. You can see below that the stairs actually come into the space quite a bit (ignore the wood stairs – they’re just temporary construction stairs). We’re going to go with a pretty minimal railing to keep things open and airy and somewhat loft-like.
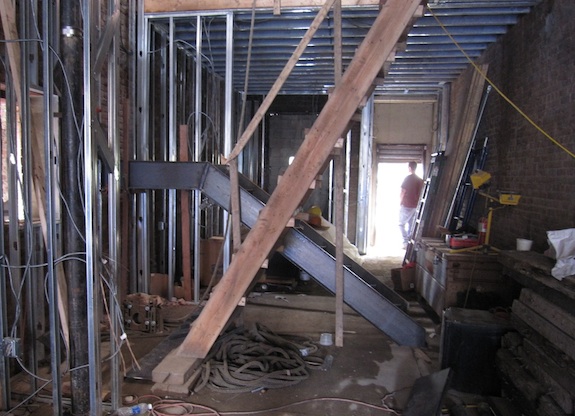
stairs in parlor floor

The first batch of stairs the fabricator brought were primed. Dan wanted raw metal with a gun metal blue finish on it, so that’s what’s going in this time. They should look pretty spectacular when they’re done. We’ve always known that they were the primary design element in our unit since they dominate and define a very vertical space (4 stories + up to a roof deck).

We’re away this week (in Toronto). When we come home we hope the first flight of stairs will be done, and progress will have been made on the roof. There’s also a host of other things that the guys can work on – it’ll be interesting to see what else gets done.

We’re finally getting sprinkler plans in this week. Initially we thought we could put them on the domestic water supply and get away with 29 heads. Now we’re up to 38 heads so we need a dedicated sprinkler filing. We also need to finalize the window order and get the deposit to the window company. (It never ends – even when we’re on vacation we’re doing house stuff)…


5 Stories & Big Bedrooms = More Expensive Sprinklers

There’s been a lot of uncertainty for us when it came to sprinklers…

  • At first we were hoping we didn’t need them (’cause we were trying to stay on budget). But we were told we do need them.
  • Then we were hoping that we only needed to sprinkler egress areas. But we were told we had to sprinkler the entire building (minus closets and bathrooms). But that’s probably a good thing – I’ll sleep better knowing it will be easier to get out in a fire.
  • Then we were hoping we could save some money by using CPVC (it’s legal for townhouses), but the plumber isn’t comfortable with CPVC – so he’s going to use black pipe.
  • Then we were hoping we could get by with 30 or fewer sprinkler heads since 30 and under can run off the domestic water supply. The architect was pretty confident we could do everything in 29 heads, but he cautioned he wasn’t an sprinkler guy and so he couldn’t guarantee it. But when a mechanical engineer went over the plans he decided we needed 37 heads.

So how did we get to 37 heads?

First, 5 stories = more space and more rooms to sprinkler. The top floor alone has 6 heads on it.

Second, we opted for having big bedrooms and smaller bathrooms (all of our bedrooms are over 200 sq. ft.) Turns out they’re bigger than can be covered with a single sprinkler head. If we were an office building it wouldn’t be a problem. The issue is that residential buildings tend to have a lot more flammable items along the walls – art, wall coverings, furniture, etc. That means residential sprinkler systems are required to soak the walls, not just the floors (as is typical in office buildings).  The architect suggested extended coverage heads that throw water over a bigger area, but the mechanical engineer determined that we didn’t have enough water pressure for those types of heads.

Cost-wise it turns out that our water connection was no good, so we have to do a new connection to the water main anyway. So going over 30 heads won’t be that much more expensive than what we would have had to do anyway. But I’m sure we’ll be seeing a change order for the extra heads…

concealed sprinkler head

BTW, I realized talking to some people a while back that some people don’t realize that sprinklers don’t have to be ugly any more. New sprinklers are usually just little discs on the ceiling like in the picture to the right.

Next the plumber has to figure out how he’s running the sprinkler pipes. We’re supposed to have recessed/concealed heads, but I’m not sure where the sprinkler pipe is going to go – there are drain pipes in the way in some places and dropping the ceiling isn’t an option in some places where we’re already at 8′ ceiling height. So the sprinkler drama isn’t quite over yet…

The Bulkhead Gets Stucco

Things are slowing down just a little – mostly because there are a few critical things that can’t happen for a couple months (utilities and windows) and there’s no point in doing a “hurry up, then wait”. It’s better security-wise if they work a little slowly so someone is in the house every (week) day. They’re still making progress though…

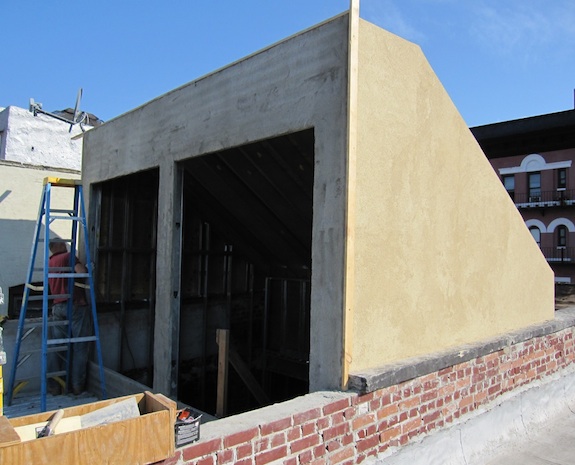
Right now the critical path is the roof (when it rains we still get a fair amount of water in the building). To do the roofing all the stucco work needs to be done on the bulkhead and parapet walls. We were a bit nervous about the stucco color. We really wanted to see samples, but the contractor took our “sand color” comment and ran with it. Luckily he did a great job interpreting what we were looking for and we like the color…

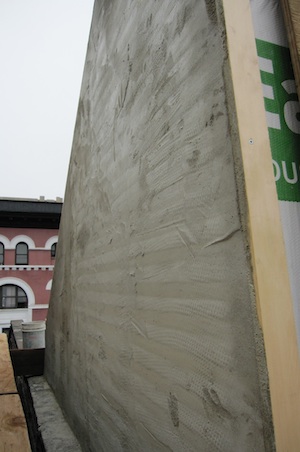
Bulkhead with stucco being applied

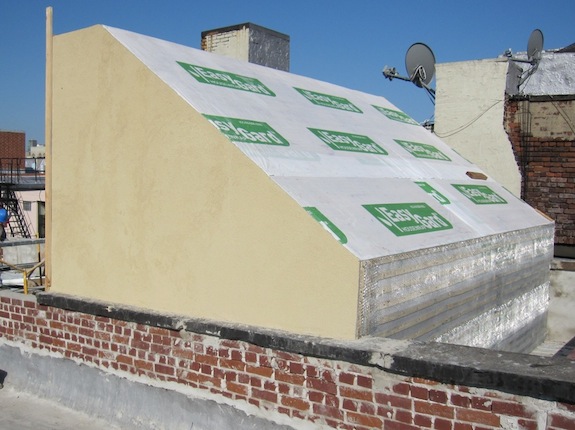
The only question is whether the color is too yellow. We had an architect with us yesterday when we saw it and her first comment was “oh… yellow…” There are some pictures where it looks more yellow and others where it looks more tan. Thing is, if it weren’t at least a bit yellow it could look drab or dirty. Yellow is what gives it it’s brightness.

Bulkhead roof with stucco partially finished

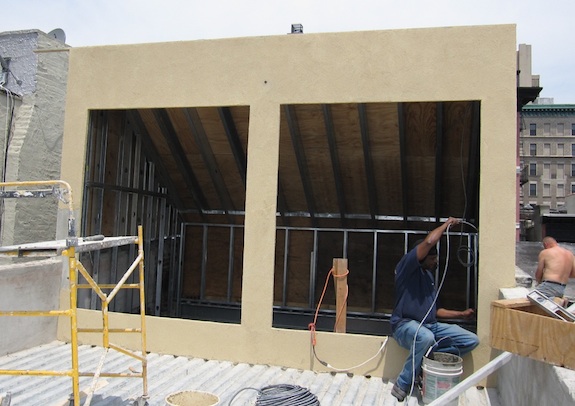
And one more, taken the next day (later in the day after I intially wrote the blog post)…

stuccoed bulkhead

So as soon as the stucco is done the next job is putting 4″ of insulation on the roof deck, building up a cricket on the front roof, installing a drain pipe from the front roof to the rear roof, and then putting on the actual roofing material. The contractor is going with a seamless spray-on system – a Kemperdur sytem.

We want a fairly light color because it would be reflective and cool. The next issue will be the color of the roof. New York City is starting to require white roofs. At first I was thinking we’d be required to literally have a white roof. But when I went and looked into the colors that are available Kemperdur roofs it seems that somewhat counter-intuitively white is not the coolest roof color. On that linked page the higher the numbers the cooler the roof. So “Cool Adobe” is the most reflective and has the highest overall “SRI” score, while “Cool Mint” is best at giving off heat. I just sent off a request for samples so we can see the actual colors. Right now we’re leaning toward “Cool Mint” – so we’ll literally have a “green roof”. I’m hoping NYC law doesn’t literally require a white roof since there are colors more efficient (and attractive) than white…

Otherwise, we’re still working out the details for the windows and exterior doors. The architect pushed back a little on the contractor’s dimensions and installation methods plus there were details that had to be worked out with the manufacturer.

The (steel) staircase in our unit is also a point of active discussion. In the process of doing shop drawings we realized there were some headroom clearance problems for the first flight of stairs. So we’ve had to reconfigure things somewhat. The funny part is we like the new configuration better than the original one. The only downside is that the steps will be slightly steeper than we wanted (7.4″ rise per step instead of 7″) – but it’s necessary to get headroom in our powder room.

We also heard through the grapevine that a neighbor (on 122nd Street?) has been calling the police about our building. One time they said work was being done on the weekend when that wasn’t the case – maybe they just saw Dan and I in the building (but the police have never come by while we were there). Another time they said a fight was happening at the building when nothing like that was happening. Apparently the police are now pissed at the caller and want to figure out who they are so they can pursue the person for filing a false police report (multiple times). All I can say is… Seriously people… Do you want the neighborhood to get better or not? How is an abandoned building that would have had serious structural stability issues in a few years better than having us fix up the place?

Finishing The Bulkhead, Electical Progress & Windows

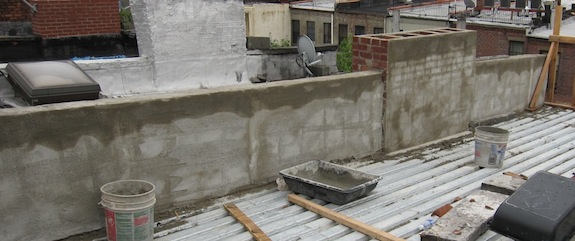
Progress was made on a few fronts this week. Before they can put on a proper roof they need to finish up the messy stuff up there – the parapet and the bulkhead. The parapet walls have been raised and around the area that will be a roof deck they’re making them look neat and uniform. Capstones will be put on top of what you see below.

parapet wall

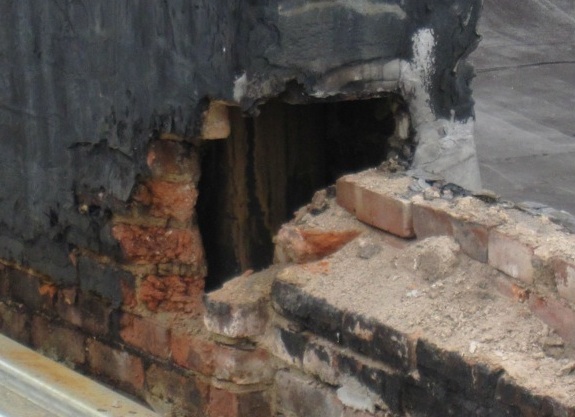
I should also mention that we’re having to rebuild our neighbor’s chimneys. They were in horrible condition with (multiple) holes in the side. Rather than debating who should pay what since some of the holes were on our side of the wall (but their chimney) – it was easier to just fix it ourselves.

hole in brick chimney

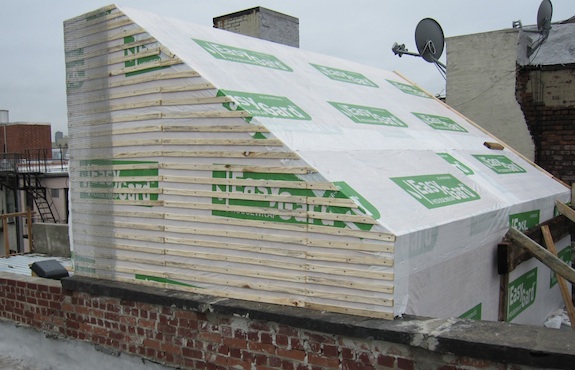
lath on the bulkhead

stucco undercoat on bulkheadThey’ve also started stuccoing the bulkhead. First step was putting up wood and wire lath. On the far side (along the alleyway) they’ve done the next step and put first coat of concrete (?). On top of that will go a finish coat.
Today we were discussing the color of the finish coat. Looks like we’ll tell the contractor to go with a sand color – light and neutral, though with all the soot in NYC air it’ll start looking dirty at some point and we’ll need to clean it.

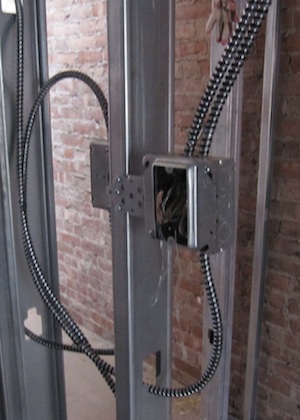
The other thing that they worked on this week was wiring. They put in the casings for the electric meters, and started wiring the top few floors.

There was a little drama with the electrician. He needed plans so he grabbed the DOB approved plans off the wall. Thing is, they’re the originals that were signed by the plan examiner and they have to be available if an inspector shows up. Wouldn’t have been a huge problem except for the fact that he marked them up with all sorts of different colored markers. I’m not sure exactly how you replace original, signed plans… Needless to say there were some tense moments as I made it clear we weren’t happy that it had happened.

switch box in metal studs wires

The other thing we worked on this week was the window order. We’re ordering from a manufacturer in Austria and being European they close the entire factory for two weeks in the summer. We were hoping to get the windows shipped before the holiday, but it turns out we were too late.  🙁  There’s just a lot of details to work out in the order and you gotta get it right – there aren’t really any do-overs with windows that are shipped from Europe. So it’s going to be a while before we get our windows…

Bullets In The Back Yard

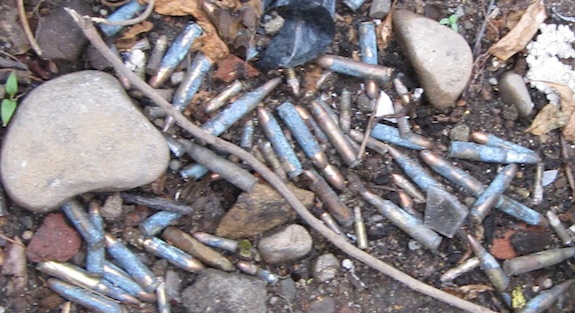
Yesterday we had some architecture students over to the house and one of them noticed something… We’re not sure what to make of it and we don’t know how long they’ve been there, but there are a whole bunch of bullets in our back yard…

bullets

There used to be concrete covering the back yard. We’re not sure if they were under the concrete or whether they’ve been thrown there recently. Given the oxidation I’m guessing they’ve been there a while.

What’s the proper way to dispose of bullets? Should we take them to the police precinct?

UPDATE:

So I gathered the bullets up and took them into the precinct. They were NOT happy to see me – they said I should have called 911. But seriously… flashing lights and sirens for a bunch of old bullets? They also thought I was bonkers for waiting two days to deal with them since I saw them on Saturday and didn’t do anything until Monday. But it’s not like they were going anywhere… I think they were most upset that they couldn’t get someone else to do the paperwork. They seemed to agree with me that the bullets were quite old – probably under the concrete for decades.

I stopped counting bullets at 30. I think there were probably 50 bullets there – at least three different calibers. There were these little baby bullets – I’d never seen anything that small before. The big ones seemed like they were on the small side of what you’d use in a rifle.