ConEd Says EIGHT MONTHS To Get Gas/Electric Service

Today was not a good day. The ConEd guy came by and said it could be as much as 3 more months to get gas and electric service. We’ve already waited 5 full months – so that means 8 months to get utility service. That’s absurd.

The first five months was because ConEd refused to install their part until DEP had installed the new water main connection. Word to the wise – just flat out lie to ConEd and tell them you’re using the existing water main connection. The water main sub contractor will be under the control of your contractor – just get them to dig carefully. Also, a good idea is to put the new gas and electrical connections as far away from the water main connection as possible – it will minimize the chance that ConEd’s stuff will be disturbed.

But the rationale behind the additional 3 month wait is just retarded. Apparently ConEd only has one contractor working for them who’s got clearance to dig up streets in New York. There’s another contractor lined up but someone is dragging their feet signing the paperwork to get that contractor going. Meanwhile the first contractor has a backlog of 70 to 80 jobs, hence the 3 month wait.

But it gets worse… ConEd’s budget for installing new electrical/gas service is nearly exhausted. There’s no money at ConEd to pay their contractor to do the installations. What properly run business doesn’t have the money to start up new accounts? That just boggles my mind. They have to spend the money sooner or later and the sooner they do the installation the sooner they make money off us.

Needless to say, I blew up. 8 months is insane. The ConEd guy said he couldn’t start our 3 month wait because the electrical / plumber hadn’t put in the new sleeves (holes in the wall). So I was all over the electrician asking why they weren’t done yet. He said they weren’t done because he said ConEd said they wanted to wait for the water connection to be done. So I pushed further – why not just put them in anywhere (they could always be redone)? Then the electrician and the ConEd guy both tried to say they had to wait to see where the water connection came through the wall. I wasn’t having that excuse – the water connection came through EXACTLY where it had been before. Nothing changed.

Then I was all over the ConEd guy – if he knew it was a 3 month process why didn’t he say something to that effect earlier? Why not get us into the queue months ago? Why do we have to wait 5 months to start on a 3 month wait? If he had put us into the queue at 2 months we would be at the top of the queue now and everything would be fine. After waiting for 5 months we shouldn’t be told we have to go to the back of the queue.

When it was clear the ConEd guy was at fault, he said he needed to go to another appointment and he just turned and left. Nice. He causes us major problems and can’t even say ‘sorry’.

I should stop and say that as much as I rag on the bureaucracy at City agencies, our experience with DEP to get the new water connection was nearly flawless by comparison. Despite a hurricane doing a direct hit on the City, DEP managed to get us a water connection two weeks and two days after we got final signoff from DOB. Kudos to DEP!

The only silver lining to all of this is that the additional 3 month wait won’t hold anything else up. The electrical and gas inspections can be done without electrical or gas service. So we can close up the walls, etc. Still, it’s a bit insane that we won’t get electrical and gas service until right before we move into the building. Pretty much the entire job will be done off generators. Hopefully there won’t be freezing weather before we get gas and electric, since we’ll need those for heat to stop the pipes from freezing.

So there is something worse than the NYC Department of Buildings… ConEd…


Update #1 (that night): I’ve filed a complaint with the New York State Public Service Commission Office of Consumer Services. They have a handy online form you can use to make complaints against utility companies. We’ll see if it helps.

Update #2 (the next morning): Dan called the guy’s boss and left a message and then the boss called back a half hour or so later and said he had talked to the guy several times about us this morning. I think after I blew up yesterday the guy realized he had to do something. They’re now on top of things and are going to make sure there are no delays. The boss reiterated what I had been told that 3 months is a worst case scenario, but he didn’t say what the average wait time is. If it’s 2+ months then it’s still the same problem. We don’t know whether he’s aware yet of my complaint to the public service commission. But our strategy at this point is to be a very squeaky wheel that can’t be ignored.

Don’t Put Closed Cell Foam On Brick

We’re using closed cell foam for insulation on all exterior walls and in the roof (which also has rigid foam). If you’ve ever been on a boat and seen foam cushions that have a smooth shiny surface to them – that’s closed cell foam. Open cell foam is more like a sponge. Closed cell foam doesn’t absorb water, but open cell foam does.

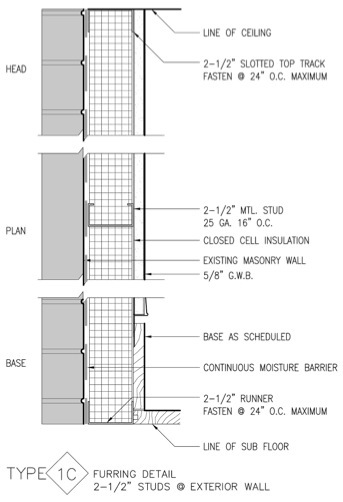
When our architect spec’d things he said there should be a moisture barrier between the foam and the brick wall. Here’s his detail…

insulated brick wall detail drawingNotice his note for a “continuous moisture barrier”. Basically “moisture barrier” is a fancy term for a sheet of plastic – there’s not much high tech about it.
Well, when the contractor started framing the walls he didn’t put up the moisture barrier. He hadn’t really noticed it in the drawings and on other projects the moisture barrier had gone on the inside of the studs – between the studs and the drywall. We tried to push back, but wound up giving in. Since closed cell foam is a moisture barrier we said he could skip the moisture barrier if he wanted to.

Not putting the moisture barrier in has turned out to be a bad decision on the part of the contractor. He had the insulation subcontractor in today and she said the brick will absorb the equivalent of 1 1/2 inches of closed cell foam. So to get 2 1/2 inches of depth she has to spray 4″ of insulation (which means she’ll charge for 4″ of insulation).

I also worry about what all that absorbed foam will do to the brick, so I’ve asked the contractor to put the moisture barrier in. It won’t be very easy now that there’s all sorts of plumbing and wiring in place, but it sorta just needs to be done…

So word to the wise – if you’re using foam insulation, put a moisture barrier over your brick before you start framing the walls.

We Have Water! (and some sprinklers)

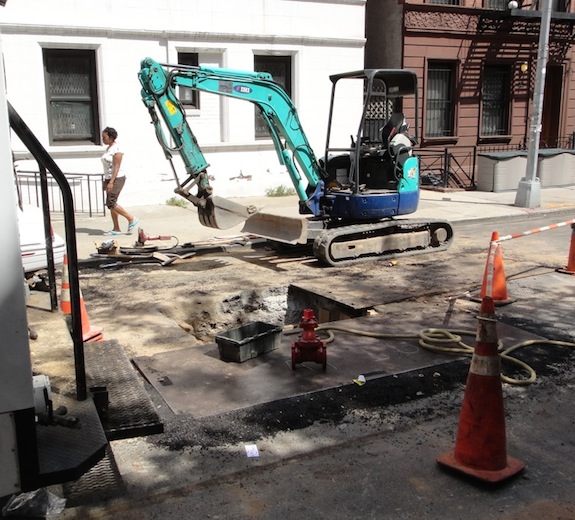
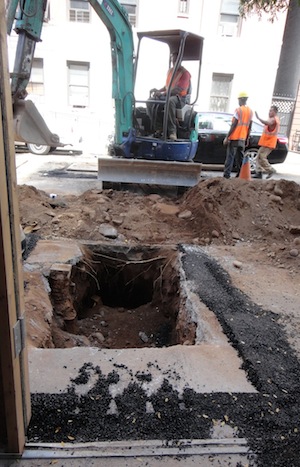
NYC street torn up for water main connectionBackhoe filling up a hole in the sidewalk

New water main connection

Today we stopped by the house and DEP was there, the street was blocked off and they were connecting us to the water main. The work was being done in a hole, so I couldn’t really get to see it happening – I could just hear welding going on. But right before we left the DEP guys came up and said “You now have water” – which was VERY good to hear.

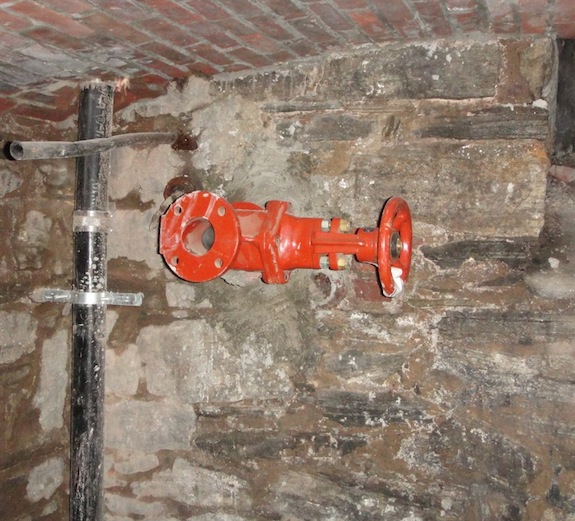
Inside the house the pipe and the valve are pretty hardcore..

valve at water connection into brownstoneCompare that to what it looked like when we bought the place – much smaller and just a galvanized pipe (I assume now they’re using black pipe)…
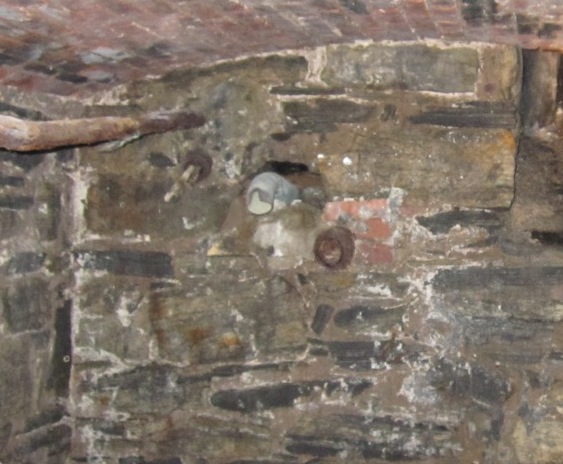
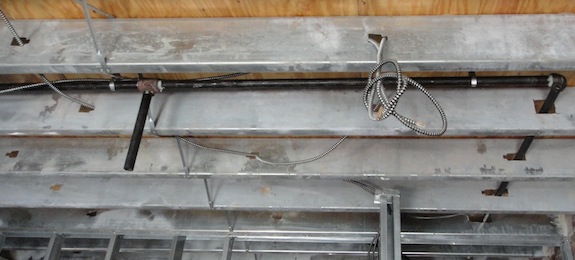
old water main line into Harlem townhouse

Notice also the corroded, cracking gas pipe coming in at the top there – it’s a bit scary – lucky it was completely inactive.

So now there’s all these sprinkler control valves that get connected to main valve. They also need to put in the water meters. Apparently that’s a hot potato no one wants to be responsible for. The water main sub contractor is saying the plumber should pull the permit for it. The plumber is saying the water main sub contractor should do it. If it were easy it would be no big deal and either one would be OK with doing it, but as we’ve seen over and over – the biggest problem with renovation in this city is the city bureaucracy.

Sprinklers

They’re also fleshing out the sprinkler system. A couple days ago the sprinkler supply risers were going in. Now they’re running pipe to the actual sprinkler head locations. When we went by they were done with the top two floors…

pipe for sprinklers installedLow voltage wiring

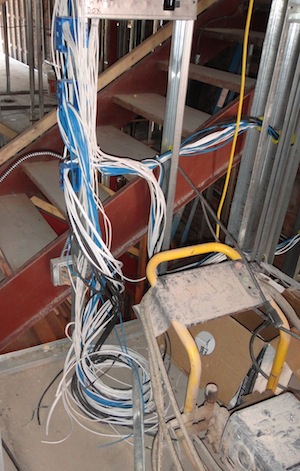
Low-voltage wiring

The low voltage / security guy also made a lot of progress. There is now lots of ethernet, cable TV, security, and even a little phone wiring in the building.

We’re getting a 6 camera security system. Three on the front of the house, two in the rear and one on the bulkhead/roof. We’ll be able to see any camera over the Internet with our iPhone – that’s sort of a cool feature that’s practical as well.


Finishing details on the stairs

There was also a guy in today doing welding on the stairs. There were a few finishing details to take care of, and they still need to do railings – but that will come a little later.

Continued work on the stoop

The masonry guy is continuing to work on the stoop. The under side of the stoop is looking pretty good and the opening for the grille is all cleaned up.

The fireplace surround

Dan’s been trying to figure out the fireplace surround. We’d like to do something nice, but don’t want it to be an upgrade / change order. I thought venetian plaster might be nice and not too expensive (since our contractor is really good with plaster work), but the foreman was pushing us to clad it in stone. Hopefully we can find a stone we like that’s not too expensive.

ConEd

The next order of business is to get ConEd to connect the gas and electric. We need electric pretty desperately since we’ve been running on generators for months now. But with 170,000 customers without power ConEd has been busy with other things lately. Hopefully we can get them in soon.

Lots Of Progress: Stairs, A/C, Sprinklers…

We had another week of full-speed work this week – lots of stuff got done.

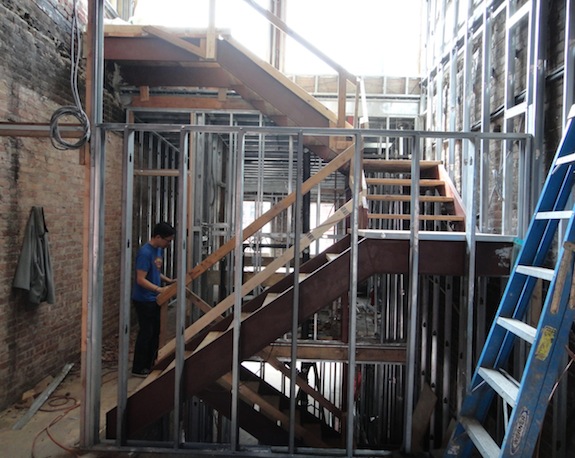
Steel for main staircase is now “done”

The steel for the 4th and last flight of stairs went in this week – from the top floor to the roof. It’s sorta cool to be able to walk all the way up and down on close-to-normal stairs. I say “done” because there are still finishing details that have to be taken care of, but it’s all there, and looking good.

One thing that needs to go in are the railings and side panels. There will be simple steel frames with plexiglass panels attached to them. The plexi will be somewhat translucent, but you can imagine that it will block a fair amount of the light you see coming through in the picture below…

Last flight of stairs up to roof

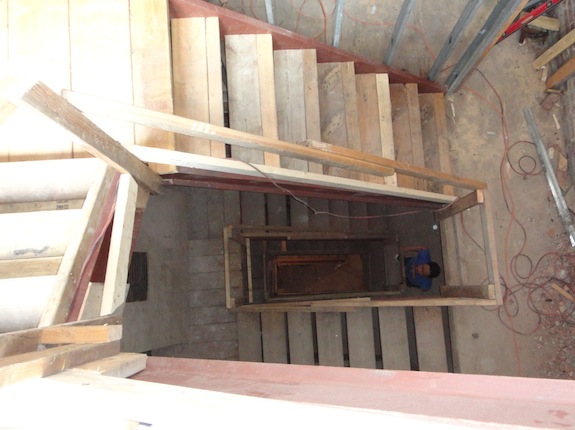
Here you can see down (and down and down…) It’s a long way from the parlor floor to the roof in a quadplex…

Looking down four flights of stairs in a browstoneIt’s really not all that spooky with all the height and the open risers – unless you’re silly enough to actually look over the railing and down the center core… Here is the view looking up…
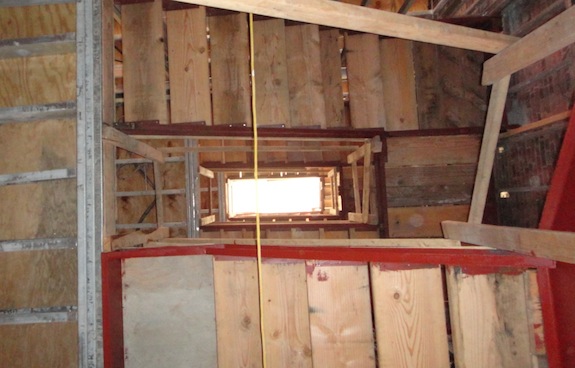
4 floor staircase looking upThere had been some debate between the stair guy and our architect. Our architect insisted on a pretty gentle 7″ rise from step to step. The stair guy was used to doing 7.5 to 8″ rise. Logistically we had to do 7.5″ rise on the top and bottom flights, but the two in between are 7″ rise. I gotta say you don’t get all that winded walking up the stairs when the slope is nice and gentle – our architect really knew what he was doing…
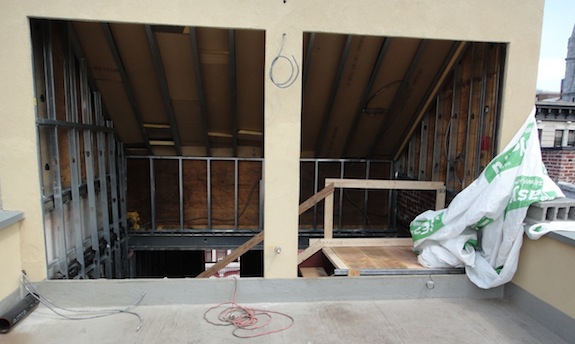
Here you can see the stairs from what will eventually be our roof deck…

Stairs to roofmini split refrigerant linesA/C refrigerant lines going in

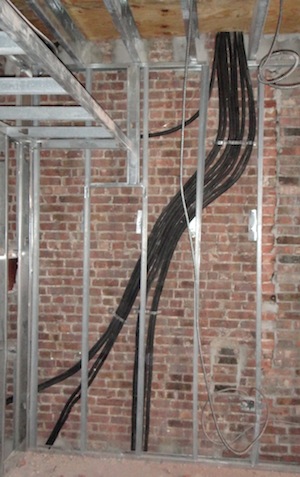
Another bit of progress this week was the refrigerant lines going in for the mini-split A/C system.

If you’re not familiar with mini-split systems they’re those cassettes that you see on the walls at restaurants and small shops. There’s a condenser unit outside and then refrigerant lines are run from the condensers to a unit inside that has a fan that essentially pushes air over cold coils.

Mini splits are quite efficient and they give you a “central air conditioning” effect without the cost of a forced air system. You also don’t give up valuable floorspace to duct work. About the only downside of a mini-split (+ radiator) system is that no fresh air gets into the building. Forced air systems usually have a fresh air intake with a heat exchanger. It’s not an issue in an old drafty building – but we’ll have to see whether it’s a problem in a well-insulated building like ours will be.

sprinkler supply linesSprinkler risers going in

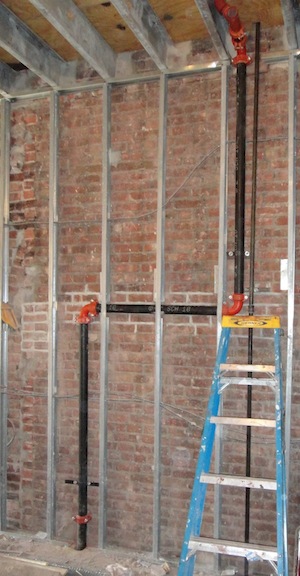
Another exciting bit of progress is that our sprinkler system is starting to go in. They’re just starting with the riser pipes.

There was supposed to be one riser going up the center of the building through the plumbing wall, but then we had the problem of how to get the plumbing lines past the stairs to the front of the building. That problem was solved by using two risers – one for the back of the building and the other for the front of the building. Now the supply lines can run through the walls and then up into the joists. (That will all make sense when it starts taking shape. But the bottom line is that with two sprinkler risers we don’t need to drop the ceilings to get the sprinklers where we need them to go – we get maximum ceiling height.

Gas lines installed

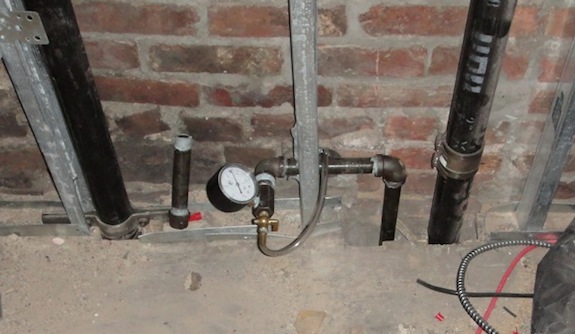
Another item they worked on this week were the gas lines (the plumber has been busy). It’s always good to see them doing pressure tests of gas lines – it’s not something you want leaking… 🙂

gas line testingGeneral plumbing being completed

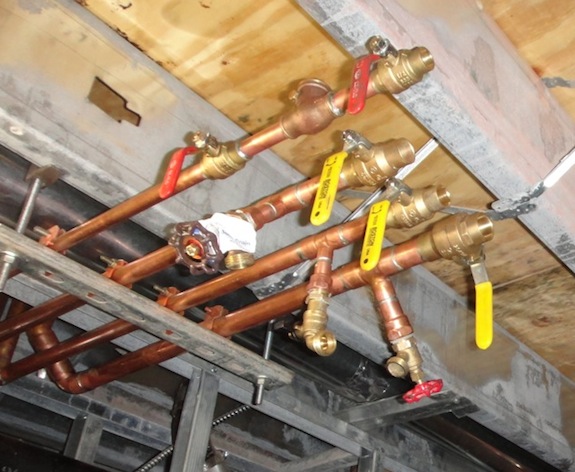
And there’s more plumbing being done… The plumber hadn’t done the copper supply lines in the rental apartment and cellar probably in part because the basement and cellar aren’t locked up as tightly as our unit is and copper is popular with thieves. But it’s finally going in as they finish off the plumbing. We did have to remind him at one point that gas and water needed to be separated for the two units.

plumbing control valvesStreet torn up, but water main connection delayed
I should have taken a photo, but forgot… I was expecting things to be really torn up when we got there today, but they weren’t. There was a big plate in the middle of the street where they had torn up the street and then put a plate over it. I guess they need to trench all the way to the house, but they haven’t done that yet.

They were supposed to start tearing things up on Monday. Then they said Tuesday. Then they said Thursday with DEP coming on Friday. But then hurricane Irene became an issue and folks at DEP were told to do storm prep, so our water main connection is now supposed to happen on Monday (possibly).

I get the sense that the water main sub-contractor (different from the plumber) is a bit of a prima donna since they deal with something that is rather complicated and delicate. They show up when they show up… But it’ll get done fairly soon – just not sure exactly when.

Ducting being put in

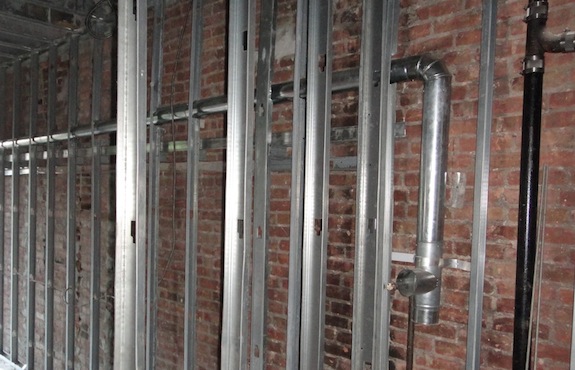
Last week they started running ducts. This week they went further. There’s the dryer ducts, the bathroom vent ducts, and the chimneys for the boiler and water heaters.

Ductingnew stoop archStoop restoration begun

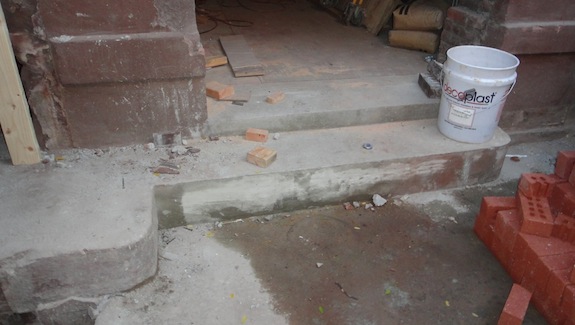
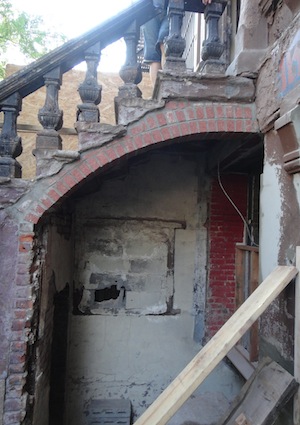
Another cool step forward is that they’ve begun work on the front of the house. To the right you can see that they’ve rebuilt the arch that holds up the upper part of the stoop. That brick will be covered in “brownstone” stucco.

The foreman debated how to build the arch and opted for a nice delicate arch. I like it. It’ll let in more light and give more headroom when getting to the door to the basement apartment.

They are actually two (French) doors into the basement rental unit – the one under the stoop and what used to be a window originally. The one under the stoop is too narrow to be a legal fire egress, so we had to maintain the other door that was originally a window. Since we raised the floor slightly in the basement the step into that door needed to be redone…

the step into the basement apartmentThe narrow portion is new, the wider area is the original portion… Looks pretty good…
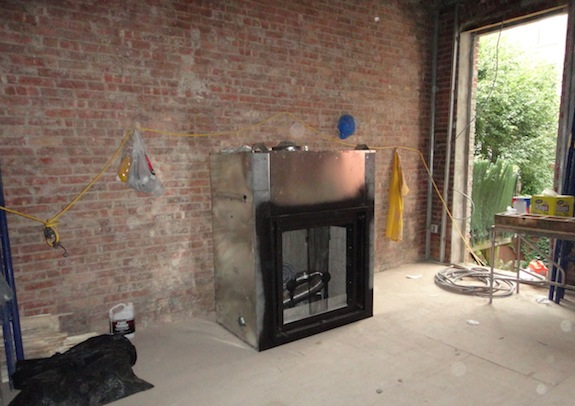
Fireplace delivered

Right as we were leaving today the contractor pulled up with the fireplace. It was enormous – at least the crating was… So that will get installed soon… Here’s a picture of it the following day after they had gotten it into the house…

fireplaceYou can’t really tell from the picture, but it feels like a bit of a monster in the space. One thing we like is that it has glass doors (required by code), but they can be retracted into the sides so it sorta looks like it doesn’t have glass doors.
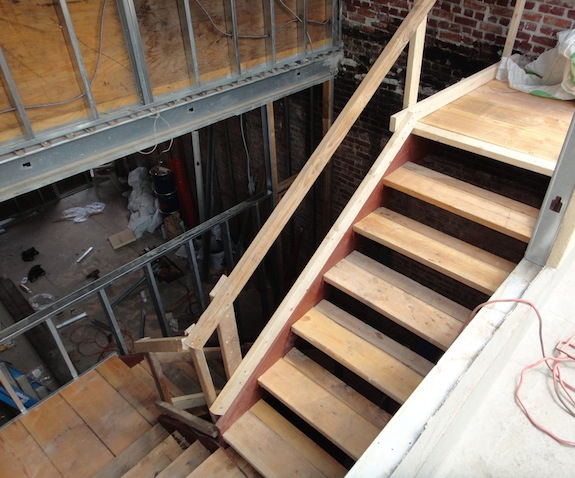
Clerestory window debate

We put clerestory windows (eyebrow windows) from the stairwell into the front bedrooms in order to get light into those rooms. In the picture below you can see the big opening at the top of the wall – all of that will be the clerestory window.

Clerestory windows from stairwell into bedroomsWe figured the bulkhead would catch a lot of light and we wanted to make the most of it. But back then we thought the stairs up to the roof were going to be L shaped – we didn’t realize they would need to be U shaped. The extra run blocks a lot of light from getting down into the stairwell – unfortunate, but it is what is is.
I was standing one flight down and noticing that the light from the bulkhead doesn’t get that far down into the building so I was wondering whether we should keep the 2nd clerestory window. Mind you, once the walls are in and painted white there will be a lot of indirect light bouncing around, but very little direct light. But then Dan noticed that even though it was early afternoon and no light was directly hitting the front of the building there was light coming in the front windows and getting through to the stairwell (though the metal studs). So that made us wonder whether we should keep the clerestory window – not to get light from the stairwell into the bedroom but to get it from the bedroom into the stairwell. Then that made us wonder whether we should put a clerestory window on the 2nd floor as well. Gotta figure that out now too…

So all in all a pretty busy and productive week.

Before & After: Repointing The Back Wall

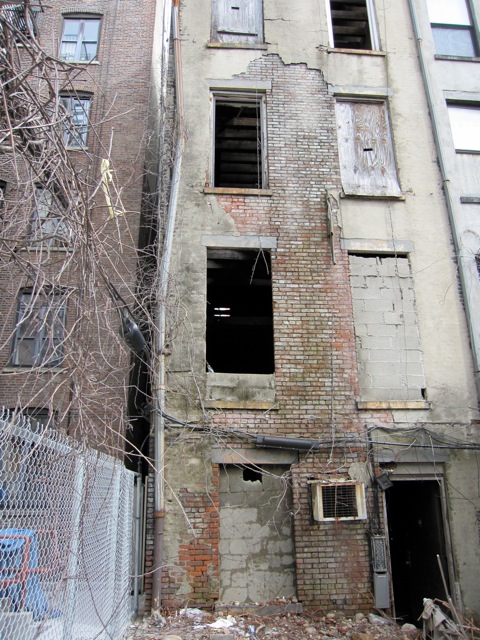
They haven’t taken down all the scaffolding in but it seems they’re done with repointing the rear façade and things are looking leaps and bounds better than they did when we started the project…

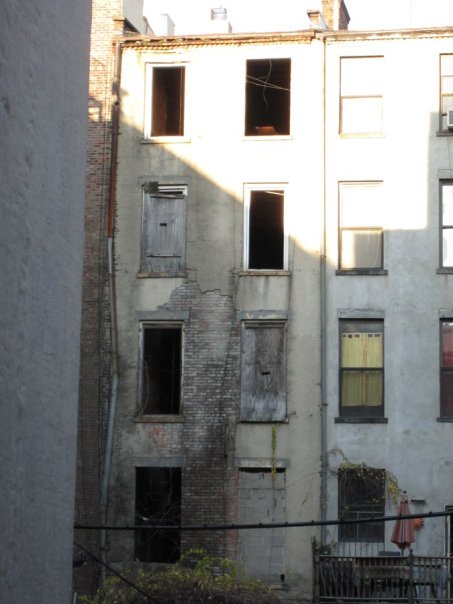
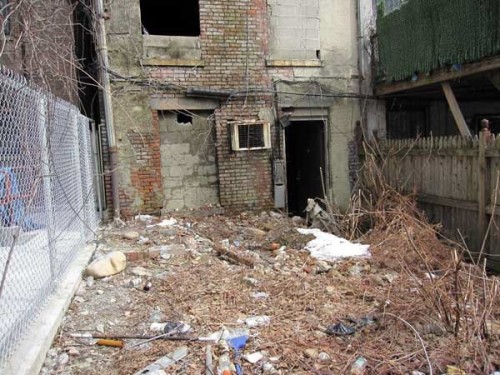
Here’s what it looked like initially…

Rear wall on townhouse shell in Harlem

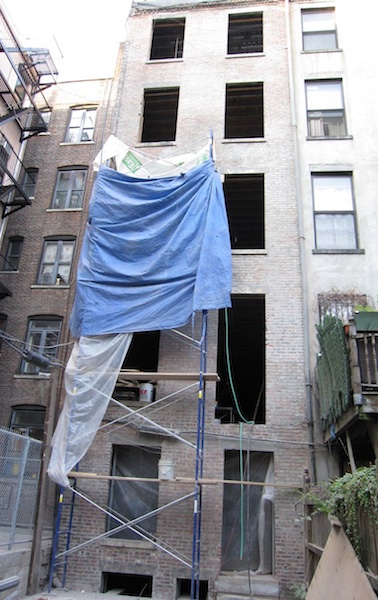
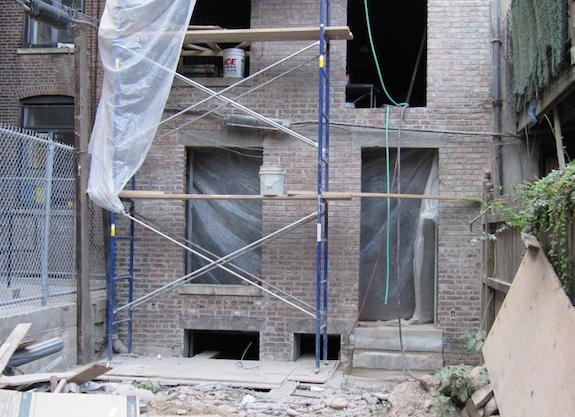
And here is what it looks like after the repointing is done…

Ground floor rear repointed - townhouse renovation

There was so much garbage in the yard when we started you couldn’t even see the cellar windows! It’s looking very neat and tidy now – as it should… And notice that you can’t even tell where the opening for the air conditioner used to be. There used to be parts of that wall that I thought could collapse – that’s no longer the case – it’s back to being a completely solid wall.

Here are some other before and after shots…

dilapidated rear wall on harlem townhouse shell

stucco falling off harlem brownstone shell

And what it looks like now…

Repointed rear brick wall on Harlem townhouse

The one thing that didn’t quite go how we had hoped was mortar color. The original color was a pinkish yellowish tan color that looked very sandy and had a high lime content. They just don’t make mortar like that anymore. Well, they can, but there are better ways of making mortar (with cement mixed in). The issue is that the base color of modern, cement-based mortar is gray, not a tan/sandy color. I’m not sure we could have achieved the original color if we had tried. Dan wanted to mix red into the mortar so the mortar would be closer in color with the brick, but even that wouldn’t have been the original color. In the end the contractor just went with the standard gray color. If it were a front façade I think we would have been pickier about the color, but the fact of the matter is that it’s the back of the house and it looks fine.

One thing I should mention is mortar type. There are several types of mortar and they vary by how strong they are…

Type M: 2,500 psi
Type S: 1,800 psi
Type N: 750 psi
Type O: 350 psi
Type K: 75 psi

You would think stronger would be better, but on historic structures the opposite is actually true. Old bricks are softer than modern brick and if you use a mortar that’s stronger than the bricks, when the wall needs to move the weakest part of the wall will be the bricks and they’ll crack before the mortar. That’s the opposite of what should happen – the mortar is supposed to give way before the bricks. After all, the mortar isn’t that difficult to replace, but the bricks are historic – you want to preserve them. You may think it’s not a big deal but think about the fact that a southern facing wall, like our rear wall, will expand slightly every afternoon due to the sun’s heat and then contract at night. Over time that can destroy your bricks if your mortar is too strong. Typically Type N mortar is what should be used on late 1800s townhouses like those in Harlem. Type S and Type M should never be used in walls with historic brick.