Finally Making Real Progress With The Staircases

The staircase in our unit has been a bit of a hassle. The guy fabricating it does good work, but he’s not a big fan (or follower) of plans. Explain what you want to him and he’ll get it done, but when the architect insisted on shop drawings he resisted. I remember one time there was a panicked call about the stairs (“the architect miscalculated”) and I rushed down to the job site just to find that the confusion was easily cleared up by looking at the plans where it was all quite clearly laid out. Stuff like that has happened more than once – now I just take it in stride.

Anyway, when the stair guy resisted shop drawings it was with the proviso that if he didn’t have shop drawings he’d have to correct whatever we didn’t like. So in round one he did the stairs the way they were laid out on the original plans and delivered them to the job site the day after the architect had figured out there was a design flaw and they couldn’t be done that way. So the stair guy just put everything back in his truck.

In round two we discussed doing them one way but in actuality they couldn’t be done that way because the steel had to be cut at one point and it was cut so much it was too weak. It was something that would have been discovered with a shop drawing, so 2 of the 3 runs of the stairs had to be removed and redone.

Yesterday they put in their third attempt – and indeed the third time is a charm – only minor changes needed. Here’s what they look like…
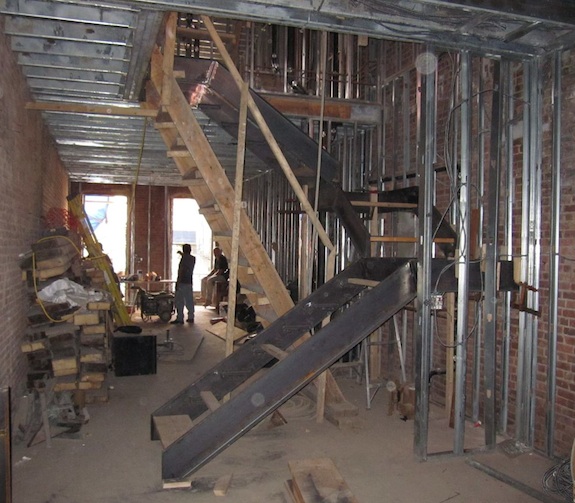
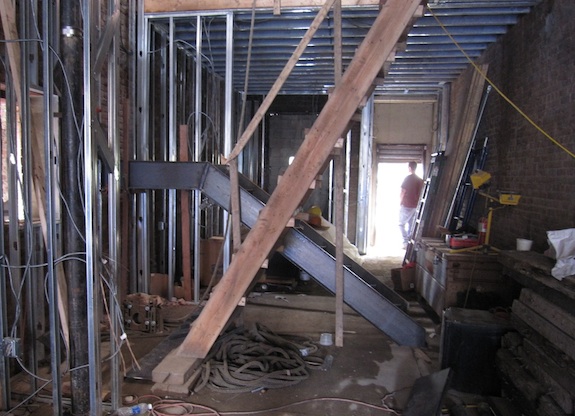
Constructing parlor stairs out of steel in Harlem brownstone

You’re looking from about the entry way. To the right in the foreground is the kitchen. Under the stairs against the wall will be a powder room which is turning out to be surprisingly big. Beyond the stairs is the dining room and then the living room.

Now that we’ve pretty much resolved the issues with the stairs, the rest of them should go much faster since all the other floors are pretty much just like the first floor. I think initially they were saying he could do one floor a week. So we could have them all in by the first week of August. Actually, as soon as this first flight is done the workmen can get the bath tub up to the guest bathroom and install it. That will  be cool…

Last time I mentioned the stairs I said Dan wanted them done in gun metal blue. That’s a really fussy thing to ask for. It has to be finished on site and it’s prone to rusting even after you put the finish on. This morning our architect mentioned another possibility and Dan and I both sorta like it… Paint the steel white (instead of having a gun metal blue patina), then have milky white plexi side panels (instead of clear). The side panels will be in these swoopy organic shapes, so the architect’s approach de-emphasizes the structural components (the steel) and puts the emphasis on the panels. We like that change. We also like that it reduces the color palette in the stairwell (always a good thing). The downside is that at the top when the stairs go up to the roof the milky white panels will block more light from the bulkhead windows  than clear panels would. And at the bottom on the parlor floor the milky white panels will make the space feel more chopped up. So we’re thinking about it for a couple days…

They’re also starting to make progress on the staircase in the rental unit. That will just be a standard wood staircase – nothing complicated about it…
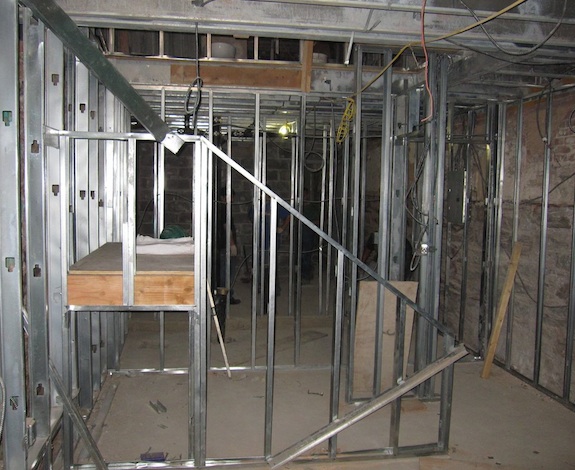
Progress on stairs in rental unit

You can see the platform has been framed in. There will be stairs going up and down from there. You can also see that the stairs are open to the cellar “storage area” (media room / work room).

There will be a door to a closet / storage area under the stairs (barely visible in the photo), and a small door to get to the less accessible space under the stairs (which is quite visible in the picture. One huge plus about the rental apartment is that it will have tons of storage. There’s a huge laundry room with plenty of space for storage, plus all the space under the staircase, plus two closets on the ground level. Hopefully that will make it stand out compared to most New York apartments that have just tiny amounts of storage space.

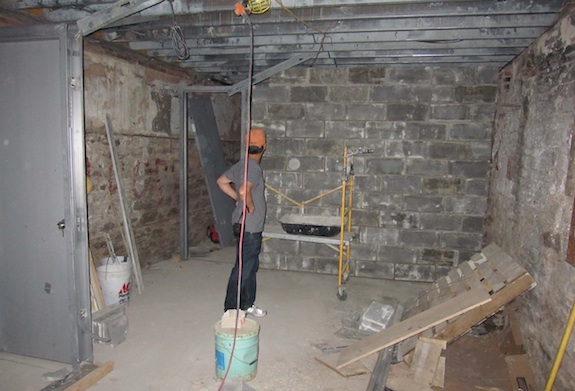
 

Cellar Storage Area Gets Walls

We stopped by the house yesterday and noticed the cellar storage area now has walls. We have this unusual arrangement where there are two entrances under the stoop – one to the cellar and one to the basement/garden apartment. That means we can have a storage area and a utility room in the cellar and not have to go through the tenant’s apartment to get to them.

The boiler/utility room feels huge – probably far bigger than it needs to be. The storage area feels a bit small – I probably should have pushed the architect to take space from the boiler room and given it to the storage room, but that is what it is… Unfortunately the utility/boiler room is too far from the lot line to have things like sprinkler control valves – they’re (unfortunately) going in the “vault” area (the area with a vaulted brick ceiling under the “front yard”).

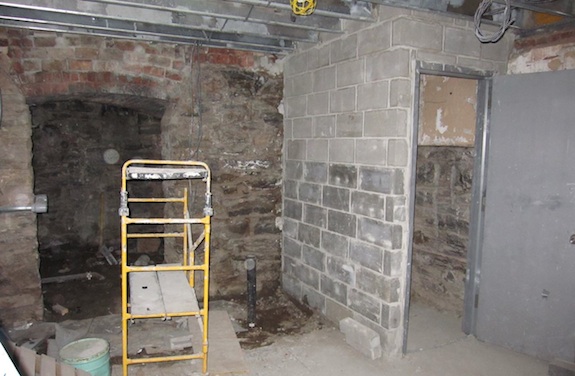
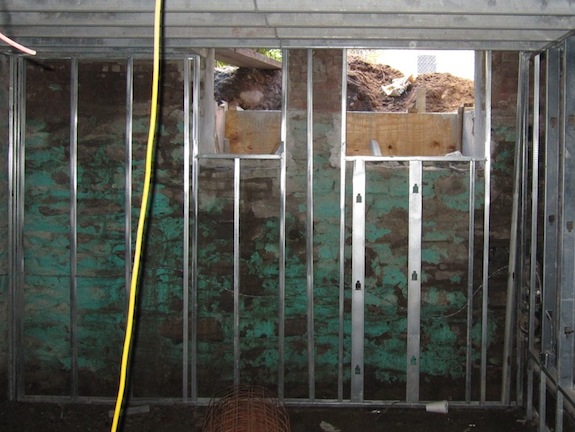
Here’s a picture looking back. That’s the new cinder block wall between our storage area and the boiler/utility room.

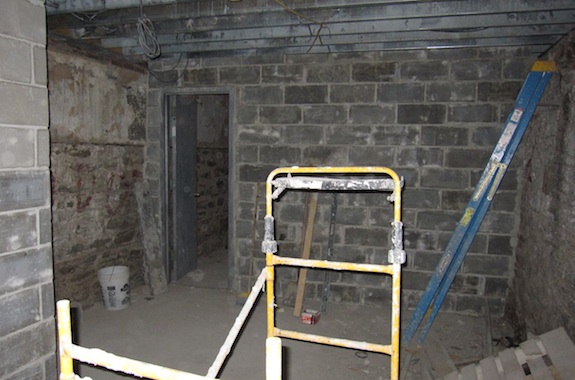
Cellar storage area with rock and concrete block walls

We’re leaving the rock walls (foundation) pretty much as they are – not framing them out or anything. That will make it a bit chilly down there in the winter. The wall to the right is actually has air on the other side since the apartment building next door has a below-grade alley way.

There’s graffiti on the rock foundations. In the boiler room there’s a stick figure of a person. To the left in the picture above and to the right in the picture below there’s the words “NO DOPE” – from back when it was a drug house. I think we’ll leave those – just clean the dirt off gently. It’ll be a pretty grungy looking space – but all those layers just give it character. We have to Sheetrock the ceiling (with fireproof Sheetrock). We’re thinking of painting it medium to dark gray – the space is just too grungy for a white ceiling.

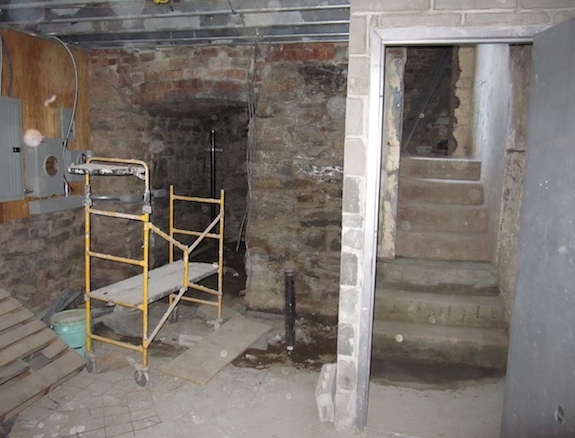
And here’s a picture looking forward – you can see how the stairs come down into the cellar from outside. (There will be a wall in there soon.)

Cellar storage area with entrance under stoop

The door was one thing the architect didn’t quite get right, but the contractor caught the problem. The architect had the door in line with the wall, which would have put it in the middle of the stairs. The contractor caught the problem and said we need 36″ of clear space at the bottom in front of the door. The last two steps are a mess and will be rebuilt. It’s a bit of a spooky space to walk down into, but we’ll have a light at the bottom that’s on a motion sensor.

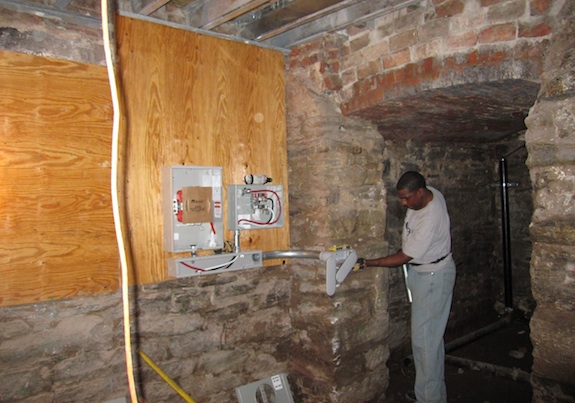
Here’s an somewhat older picture of the other corner of the room and looking into the vault area. There’s a lot that’s going to be going on there. We’ll have gas and electric meters on those boards (we refused to have them outside the building for aesthetic reasons). Then in the vault room along the wall you see will be this huge contraption for sprinkler control. Hopefully all of that will get installed in the next few weeks.

Electrical meters going into cellar near vault room

UPDATE:

Yesterday I realized the wall wasn’t constructed quite right. There’s supposed to be a 4″ concrete dam at the bottom to prevent something like a hot water tank failure from flooding the rest of the cellar. But it’s too late (unless we ask them to tear down the wall and redo it). On the plus side we were able to get a floor drain into that area (which was unexpected), so maybe my fears of flooding aren’t really an issue. We’ll let the architect make the final determination – but I’m guessing no 4″ dam…

UPDATE #2:

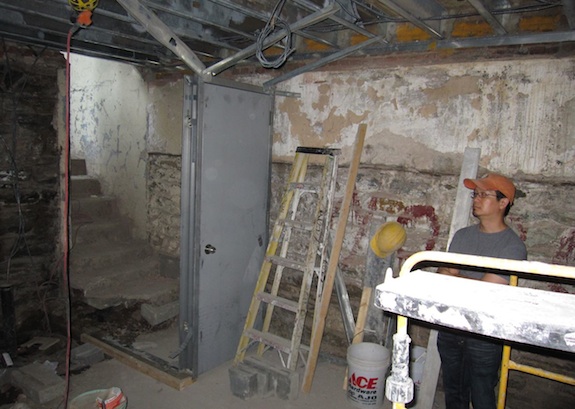
The walls are now complete. Here are some pictures… First the new wall and door at the bottom of the stairs to the outside of the building (under the stoop)…

Concrete wall around cellar stairs in Harlem Brownstone

And here you can see the actual staircase…

Stairs to cellar in Harlem Brownstone

They reconstructed the bottom three stairs – there were only two originally and we lowered the cellar floor a few inches.

Here’s the completed wall between the storage area and the mechanical/boiler room…

Concrete block wall between storage area and mechanical room

Notice there’s no lip below the door – that entire wall should rest on a 4″ high concrete dam that prevents flooding of the entire basement. We’re now not too concerned – there’s a floor drain in the mechanical room which will prevent any real flooding. If we need to we can put a dam inside the room to keep any leakage from the hot water heaters and boilers from flooding into the rest of the cellar.

We Have A Proper Roof! (+ other progress)

We were away for 10 days – up in Toronto visiting friends and family. While we were gone (and in the days since we got back), a number of things have been accomplished.

The Roof

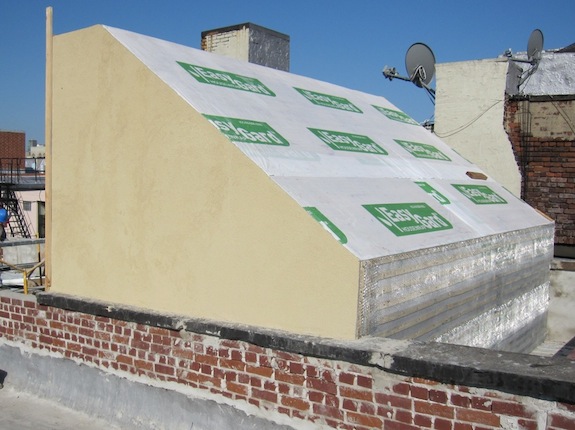
The biggest thing that got accomplished was the roof – it’s now water tight (and looks great)…

Townhouse roof with Kemper system

You can see there’s a strip there along the side that’s not quite finished and there will be additional pipes coming up through the roof, plus the bulkhead roof needs to be done. At some point they’ll come back and finish off all the little details, but by-and-large it’s done.

The architect was pleasantly surprised – he had spec’d a more traditional, less expensive roof, but the contractor decided to upgrade us to a Kemper system. The Kemper system is a spray-on resin-based roofing system. It’s quite durable and if you put enough layers of it on they’ll give you an no-questions-asked 30 year warranty. Given how expensive it is, we’re just going with the regular number of layers.

The color is light and fairly reflective, but not white or one of the approved EnergyStar colors. NYC’s white roof rule goes into effect next year. I’m not sure whether we’ll be required to have a different color or not. The contractor has said that if DOB cites us for an unapproved color he’ll paint the roof. The gray does mute the yellow-ness of the stucco somewhat. All in all I think it looks pretty good.

What you can’t see is that under the visible roof are two layers of 2″ rigid foam topped with rigid, waterproof board. That means the roof it currently at about R16 – on it’s way to R39+.

After we get the C of O we’ll flesh out the roof into a proper roof deck. We’re still trying to figure out what’s allowed in that respect and how we want it to look. We really want an ipe deck, but while it was legal for a while there, apparently it’s not technically legal (though apparently it’s very resistant to fire).

The Stairs

Stairs have been a bit of a problem. The guy who’s making them does good work, but he’s not big on formal plans – which is a bit of a problem. The architect wanted him to do shop drawings and long story short he started fabricating before the shop drawings were done and then had to rip out his first attempt. Now he’s on his second attempt and it needs some major revisions because there are details he encountered that should have been worked out in the shop drawings. We’re hoping third time’s a charm. Here’s how they look currently…

Steel stairs going into a Harlem townhouse

The reason they’re rusty is because Dan wants the stairs to have a gun metal blue finish. Once they’re installed they’ll need to be sanded down and finished with the gun metal blue (and possibly waxed). It’ll be a pretty big job, but it will look great when it’s done.

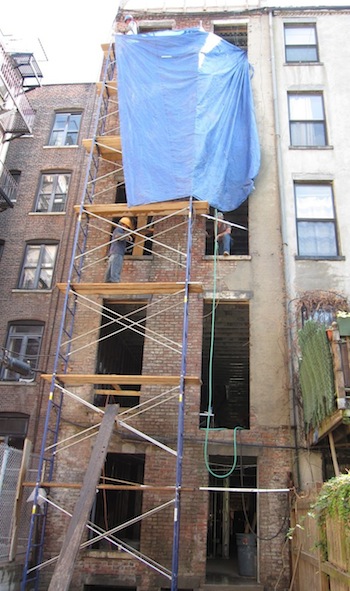
Cleaning and repointing brick on Harlem townhouseRepointing The Rear Façade

As we looked at townhouses before buying ours I frequently saw renovated townhouses that had beautifully restored brick façades on the back. We’re starting to get to that point ourselves. The contractor has put up scaffolding and is chipping off the old stucco and cleaning the brick. Next week he’ll start repointing. We want to have the the same color mortar that was there was there originally – which was slightly yellowish and pinkish. The brickwork in the house is actually really beautiful when it’s clean, so I have high hopes for the back wall.

Other Progress

Electrical and plumbing work continued while we were gone. And we finally got the window order in on Wednesday. I have a feeling windows will be an issue since they could come in pretty late – probably mid-September. The finishing work (floors, Sheetrock, etc.) can’t be done until the house is sealed up.

The thing that’s holding things back right now is sprinkler approval. We were pleasantly surprised when we were on vacation because the DEP approved our new water main connection much earlier than expected (“only” took a month – rather than the expected two months). But the water main contractor won’t proceed until the sprinkler plans are approved. The earliest that can happen is this week. We’re crossing our fingers about that since all the utilities depend on it since ConEd won’t put in gas and electric until after the water main is done.

Parlor Stairs, Lightwell/Footing & Roof Deck Taking Shape

Things are still progressing a little slowly, but nevertheless a few things moved forward in the past week…

The Roof Deck Area

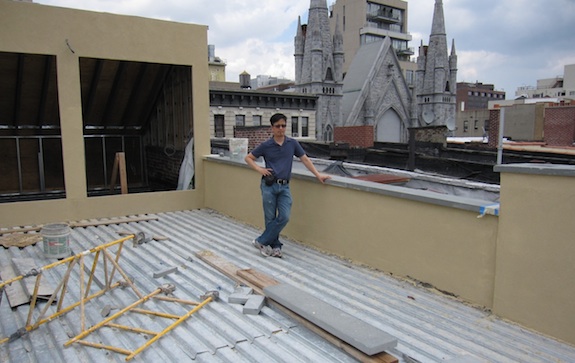
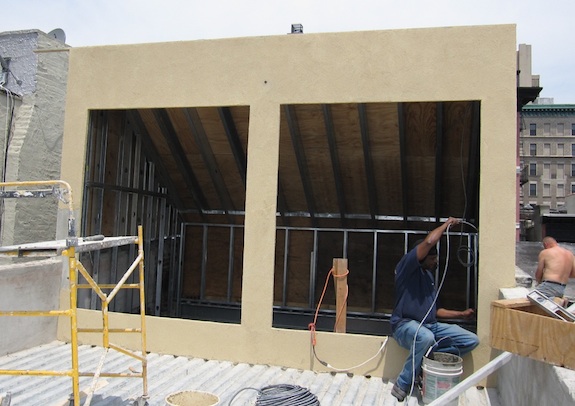
The roof deck is starting to almost look complete. Soon the only thing that will be missing are the windows/door (and some lighting). It’s sorta calming to have something that’s almost “done”.

roof deck almost looking done

Pretty much all the stucco is done. The new bluestone cap stones are in place (and look great). We were wondering what color the roof should be. There are  a number “cool roof” options, but seeing the stone and the stucco we’re agreed the roof should be a light grey. The stucco is actually more yellow than it looks in the picture – somehow the bluestone really brings out the yellow in it. So the gray will keep the color palette fairly simple.

The Back Porch Footing / Cellar Lightwell

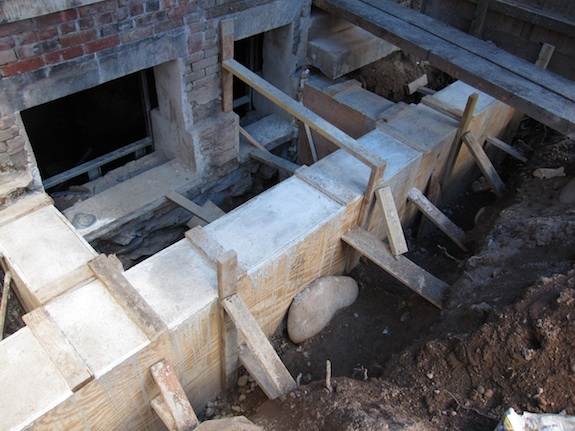
Another thing that went in quickly and is looking semi-complete is the footing for the rear deck, which is also the lightwell for the cellar windows…

footing / lightwell

As you can see, the rear deck off the parlor isn’t very big – just 4 feet deep – enough for a couple chairs, but real entertaining will happen in the garden.

I was a little worried about the lightwell/footing affecting the view from inside, but it’s not bad – all the dirt in the picture below will be graded level and we’ll keep the plants in that area pretty low so the tenant should still get decent light.

lightwell not blocking view too much

The closer you get to the window the more sky you get, so what you see in the picture is a worst case scenario, though the window framing will take a fair amount of the space you see now.

Owners’ Unit Stairs

The other thing which has progressed are the stairs in our unit. It’s actually a bit of a long story… At one point we wanted a closet opposite the stairs, so the stairs had to be configured differently than they were above, and to get enough height to have a powder room under the stairs the stairs intruded into the kitchen. Then we got rid of the closet in order to have a more open feel on the parlor floor (we’ll just use coat hooks) and we didn’t really think about the fact that that would let us change the configuration of the stairs.

The architect had said at one point that he wanted the stair fabricator to do shop drawings. He sarcastically said “if you don’t do them you’re going to wind up refabricating things when there are problems”. The contractor and stair fabricator took that as a viable option (it’s amazing how much the contractor does and has to redo when it conflicts with something else – it’s just how they work). Long story short the architect later insisted on shop drawings and offered to do them himself, but the fabricator started working before the shop drawings were done. Then the architect realized there was a headroom clearance problem where the stairs intruded into the kitchen so he told them things needed to change. The next day the fabricator went and started installing what he had already come up with, which of course was a problem. Luckily they had agreed to redo things if there were problems so he had to cart away the first set of stairs and come up with a new set.

Now the stairs are configured just like all the other stairs in our unit, though they’re slightly steeper to get clearance under the stairs for the powder room. You can see below that the stairs actually come into the space quite a bit (ignore the wood stairs – they’re just temporary construction stairs). We’re going to go with a pretty minimal railing to keep things open and airy and somewhat loft-like.

stairs in parlor floor

The first batch of stairs the fabricator brought were primed. Dan wanted raw metal with a gun metal blue finish on it, so that’s what’s going in this time. They should look pretty spectacular when they’re done. We’ve always known that they were the primary design element in our unit since they dominate and define a very vertical space (4 stories + up to a roof deck).

We’re away this week (in Toronto). When we come home we hope the first flight of stairs will be done, and progress will have been made on the roof. There’s also a host of other things that the guys can work on – it’ll be interesting to see what else gets done.

We’re finally getting sprinkler plans in this week. Initially we thought we could put them on the domestic water supply and get away with 29 heads. Now we’re up to 38 heads so we need a dedicated sprinkler filing. We also need to finalize the window order and get the deposit to the window company. (It never ends – even when we’re on vacation we’re doing house stuff)…

The Bulkhead Gets Stucco

Things are slowing down just a little – mostly because there are a few critical things that can’t happen for a couple months (utilities and windows) and there’s no point in doing a “hurry up, then wait”. It’s better security-wise if they work a little slowly so someone is in the house every (week) day. They’re still making progress though…

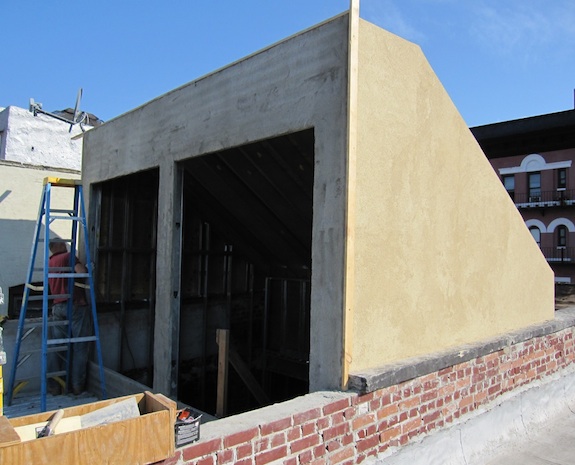
Right now the critical path is the roof (when it rains we still get a fair amount of water in the building). To do the roofing all the stucco work needs to be done on the bulkhead and parapet walls. We were a bit nervous about the stucco color. We really wanted to see samples, but the contractor took our “sand color” comment and ran with it. Luckily he did a great job interpreting what we were looking for and we like the color…

Bulkhead with stucco being applied

The only question is whether the color is too yellow. We had an architect with us yesterday when we saw it and her first comment was “oh… yellow…” There are some pictures where it looks more yellow and others where it looks more tan. Thing is, if it weren’t at least a bit yellow it could look drab or dirty. Yellow is what gives it it’s brightness.

Bulkhead roof with stucco partially finished

And one more, taken the next day (later in the day after I intially wrote the blog post)…

stuccoed bulkhead

So as soon as the stucco is done the next job is putting 4″ of insulation on the roof deck, building up a cricket on the front roof, installing a drain pipe from the front roof to the rear roof, and then putting on the actual roofing material. The contractor is going with a seamless spray-on system – a Kemperdur sytem.

We want a fairly light color because it would be reflective and cool. The next issue will be the color of the roof. New York City is starting to require white roofs. At first I was thinking we’d be required to literally have a white roof. But when I went and looked into the colors that are available Kemperdur roofs it seems that somewhat counter-intuitively white is not the coolest roof color. On that linked page the higher the numbers the cooler the roof. So “Cool Adobe” is the most reflective and has the highest overall “SRI” score, while “Cool Mint” is best at giving off heat. I just sent off a request for samples so we can see the actual colors. Right now we’re leaning toward “Cool Mint” – so we’ll literally have a “green roof”. I’m hoping NYC law doesn’t literally require a white roof since there are colors more efficient (and attractive) than white…

Otherwise, we’re still working out the details for the windows and exterior doors. The architect pushed back a little on the contractor’s dimensions and installation methods plus there were details that had to be worked out with the manufacturer.

The (steel) staircase in our unit is also a point of active discussion. In the process of doing shop drawings we realized there were some headroom clearance problems for the first flight of stairs. So we’ve had to reconfigure things somewhat. The funny part is we like the new configuration better than the original one. The only downside is that the steps will be slightly steeper than we wanted (7.4″ rise per step instead of 7″) – but it’s necessary to get headroom in our powder room.

We also heard through the grapevine that a neighbor (on 122nd Street?) has been calling the police about our building. One time they said work was being done on the weekend when that wasn’t the case – maybe they just saw Dan and I in the building (but the police have never come by while we were there). Another time they said a fight was happening at the building when nothing like that was happening. Apparently the police are now pissed at the caller and want to figure out who they are so they can pursue the person for filing a false police report (multiple times). All I can say is… Seriously people… Do you want the neighborhood to get better or not? How is an abandoned building that would have had serious structural stability issues in a few years better than having us fix up the place?